


Welcome to the 2015 Ornament Exchange! Erlene at My Pinterventures partnered 80+ bloggers to exchange ornaments and we want to share our creations or special finds with you! Over the next 14 days, a group of ladies will be sharing our ornament tutorials or shopping trips to give you lots of holiday inspiration.

Today, I’m excited to share with you the ornament I created for the Ornament Exchange, along with six other great ladies.
- Simply Kelly Designs
- Mid Michigan Mom
- Munofore
- Decor to Adore
- Tulips & Orchids
- Happily Ever After, Etc.
I was paired with Allie from I’m Just Queenin’. Allie shared with me a picture of her red and gold tree from last year which really helped me in making sure I created something that would fit her style. I had about a million ideas in mind and was really torn on what I wanted to make for her until I came across this ornament from Pottery Barn.


I LOVE this ornament, but with a price tag of $16.50, it would break the $10 maximum we could spend for the ornament exchange. So, I set out to make my own version of this ornament! Here’s what I used:
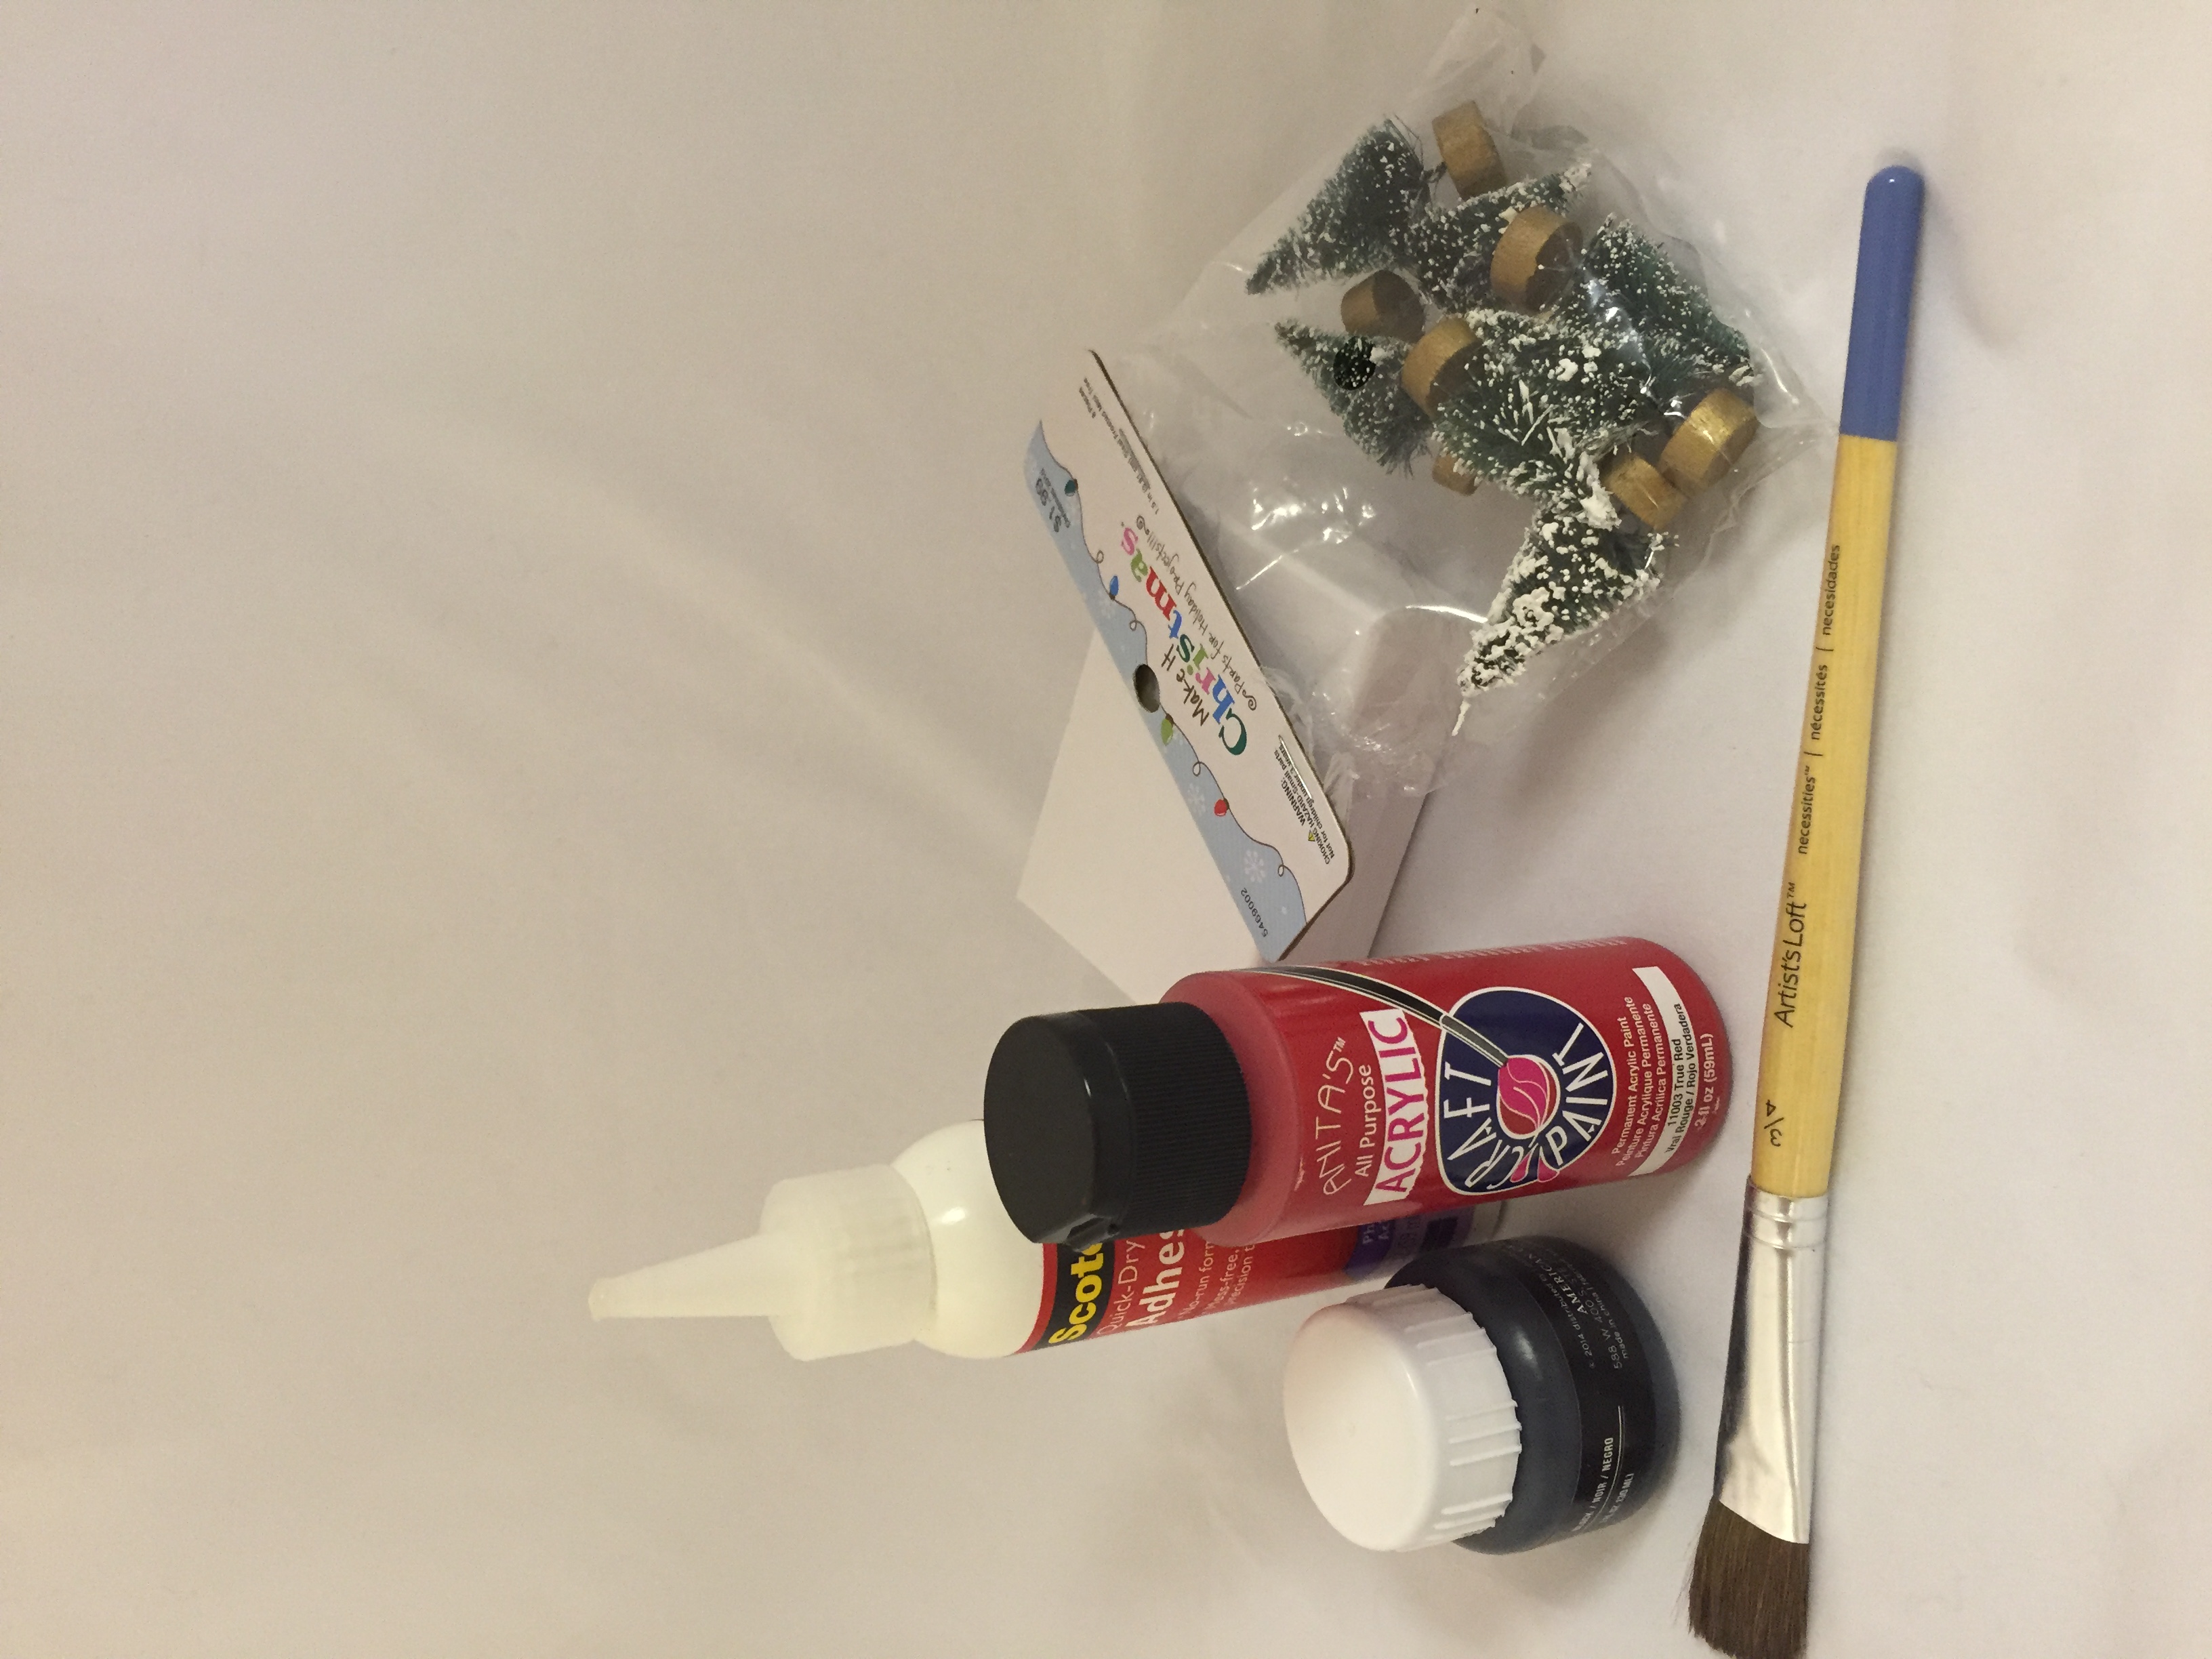
- Small Box Lid (like the white cardboard jewelry box lids)
- Small Christmas Trees (from Hobby Lobby – $1.99)
- Red Paint
- Chalkboard Paint
- Paintbrush
- Glue
- Cotton Batting (I used the batting from the cardboard jewelry box)
- Baker’s Twine
- Hole Punch
- White Glitter
- Chalk Pen or Vinyl (I used my Silhouette Cameo to cut “Merry Christmas” in white vinyl)
To get started with the ornament, I painted all but the inside of the box lid in red acrylic paint. I made quite the mess and definitely got some red paint on the inside of the box lid, but since it’s going to be covered up with black chalkboard paint, I wasn’t too worried.
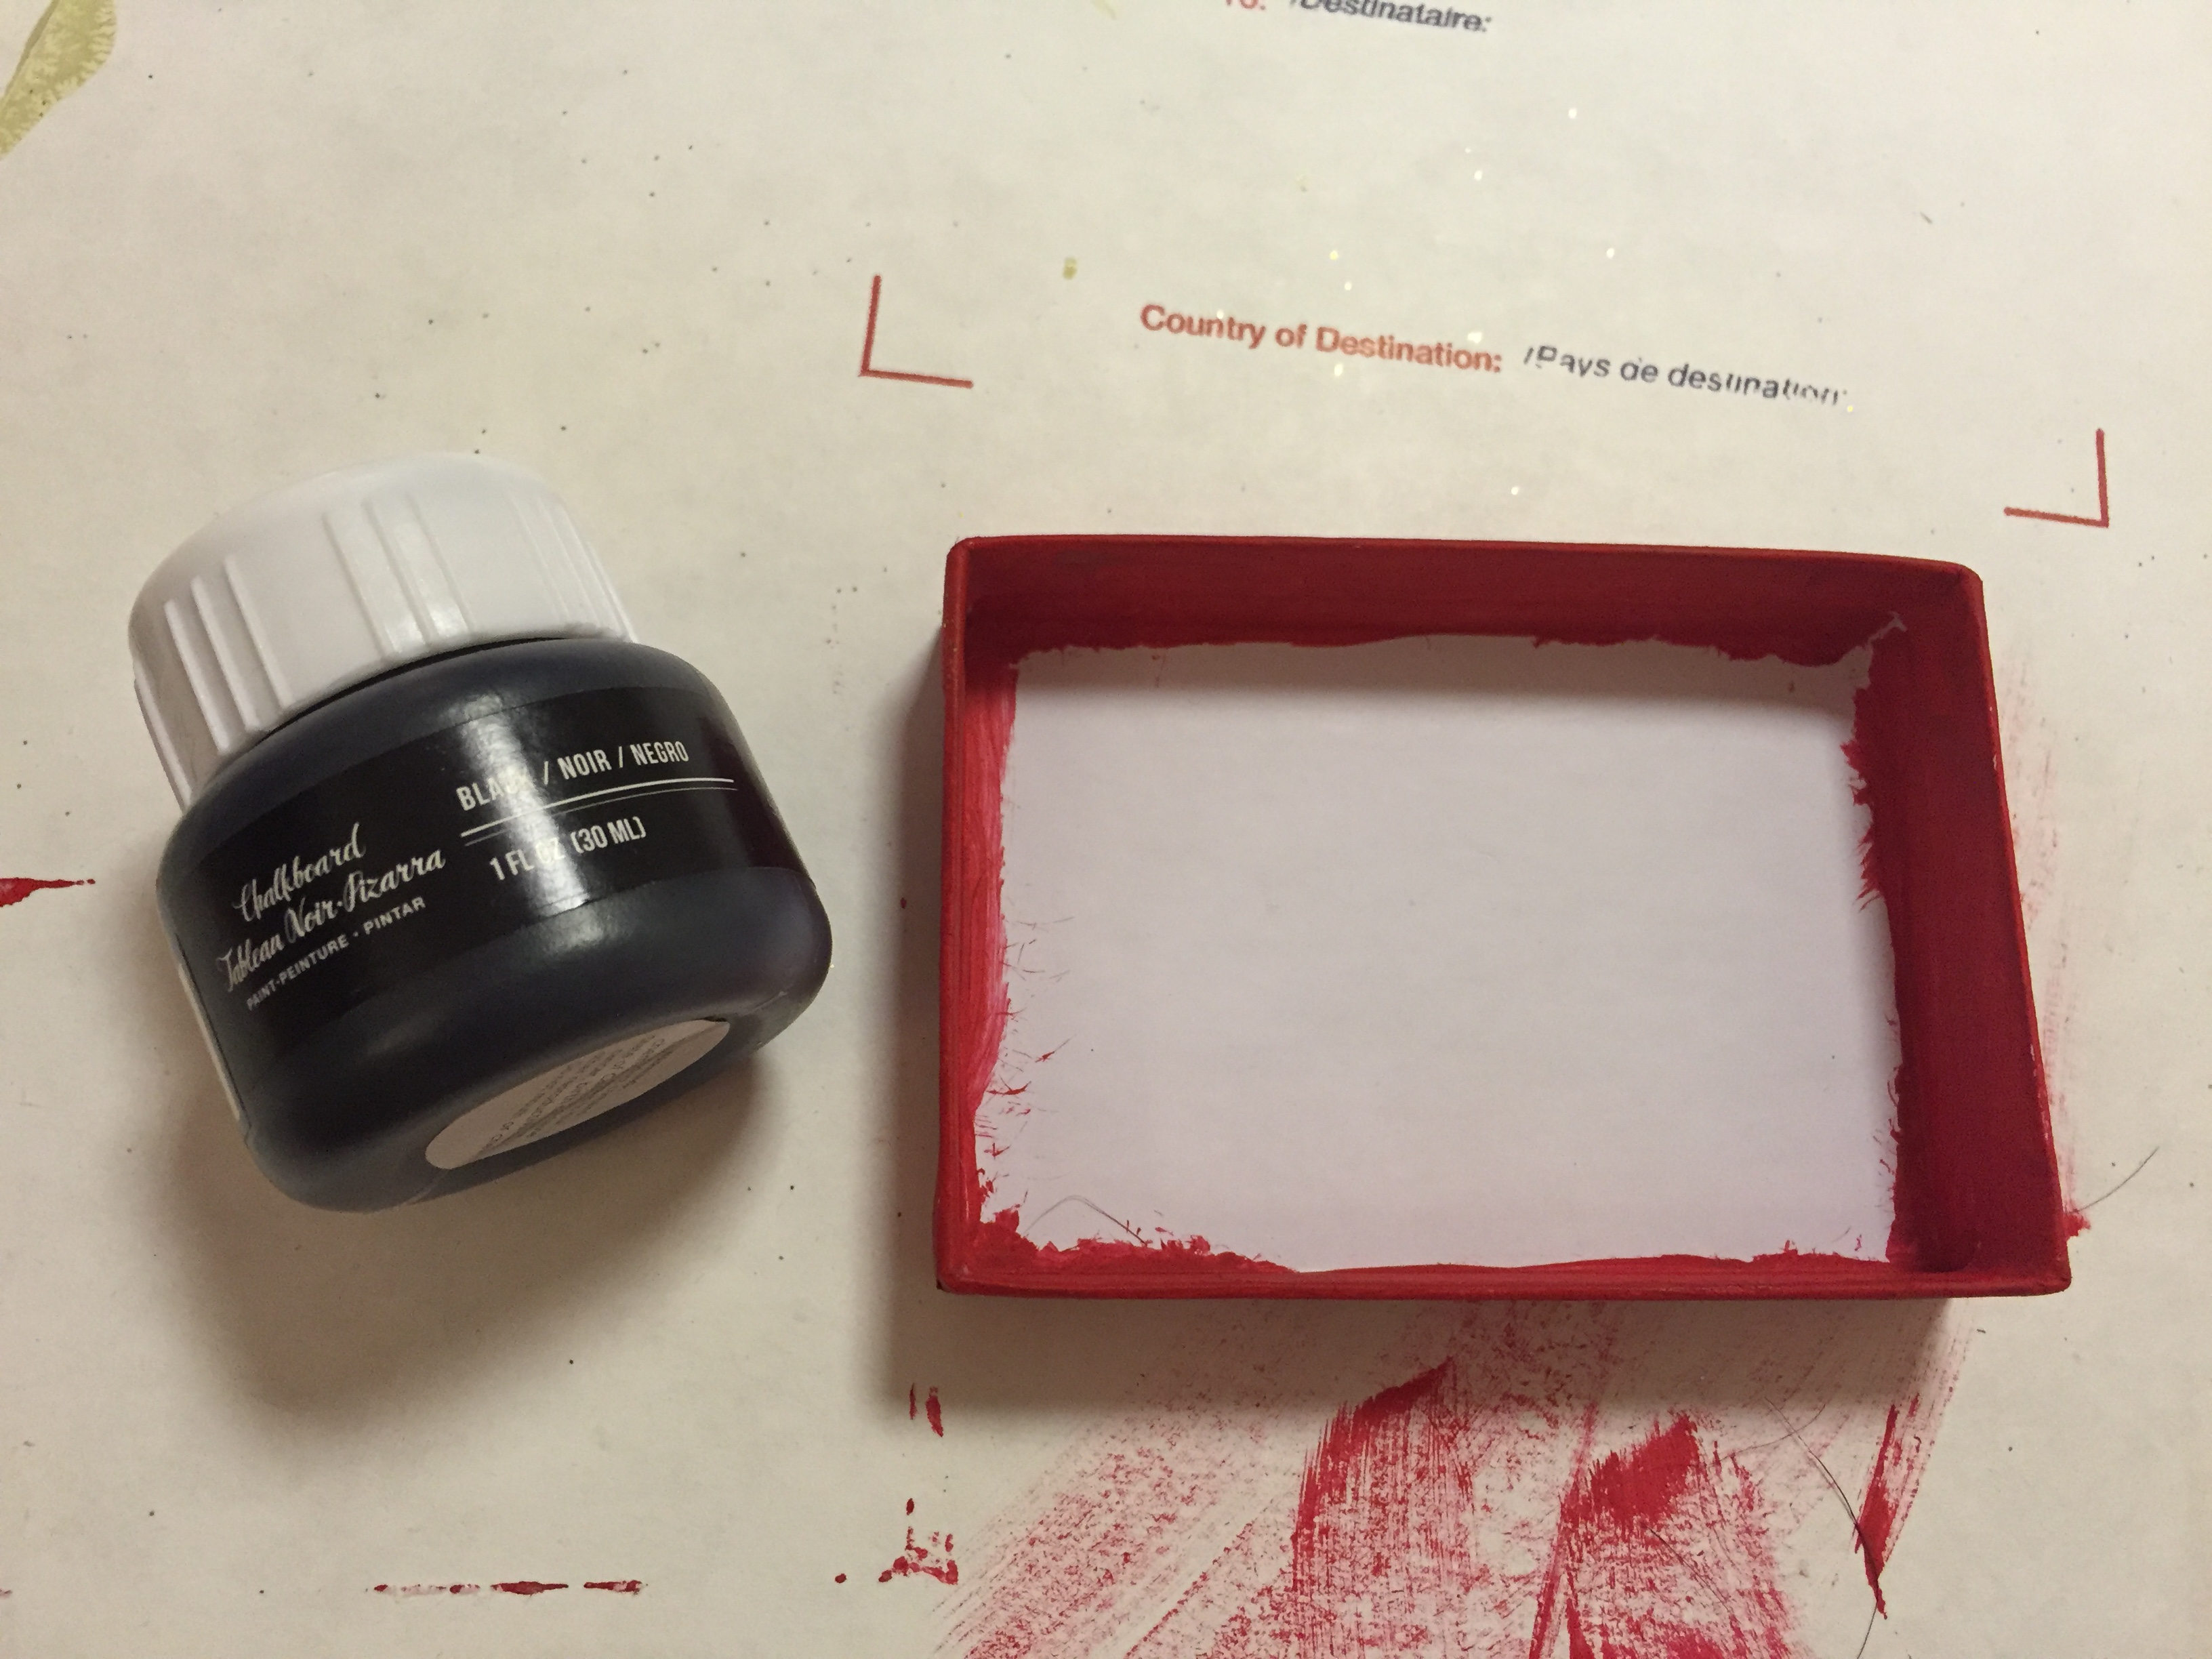
Once the red paint was completely dry, I painted the inside of the box lid with the chalk paint. This time I had to be a bit more careful as I didn’t want the chalk paint to get on the sides of the box lid. Admittedly, a few little spots had to be touched up. 😉
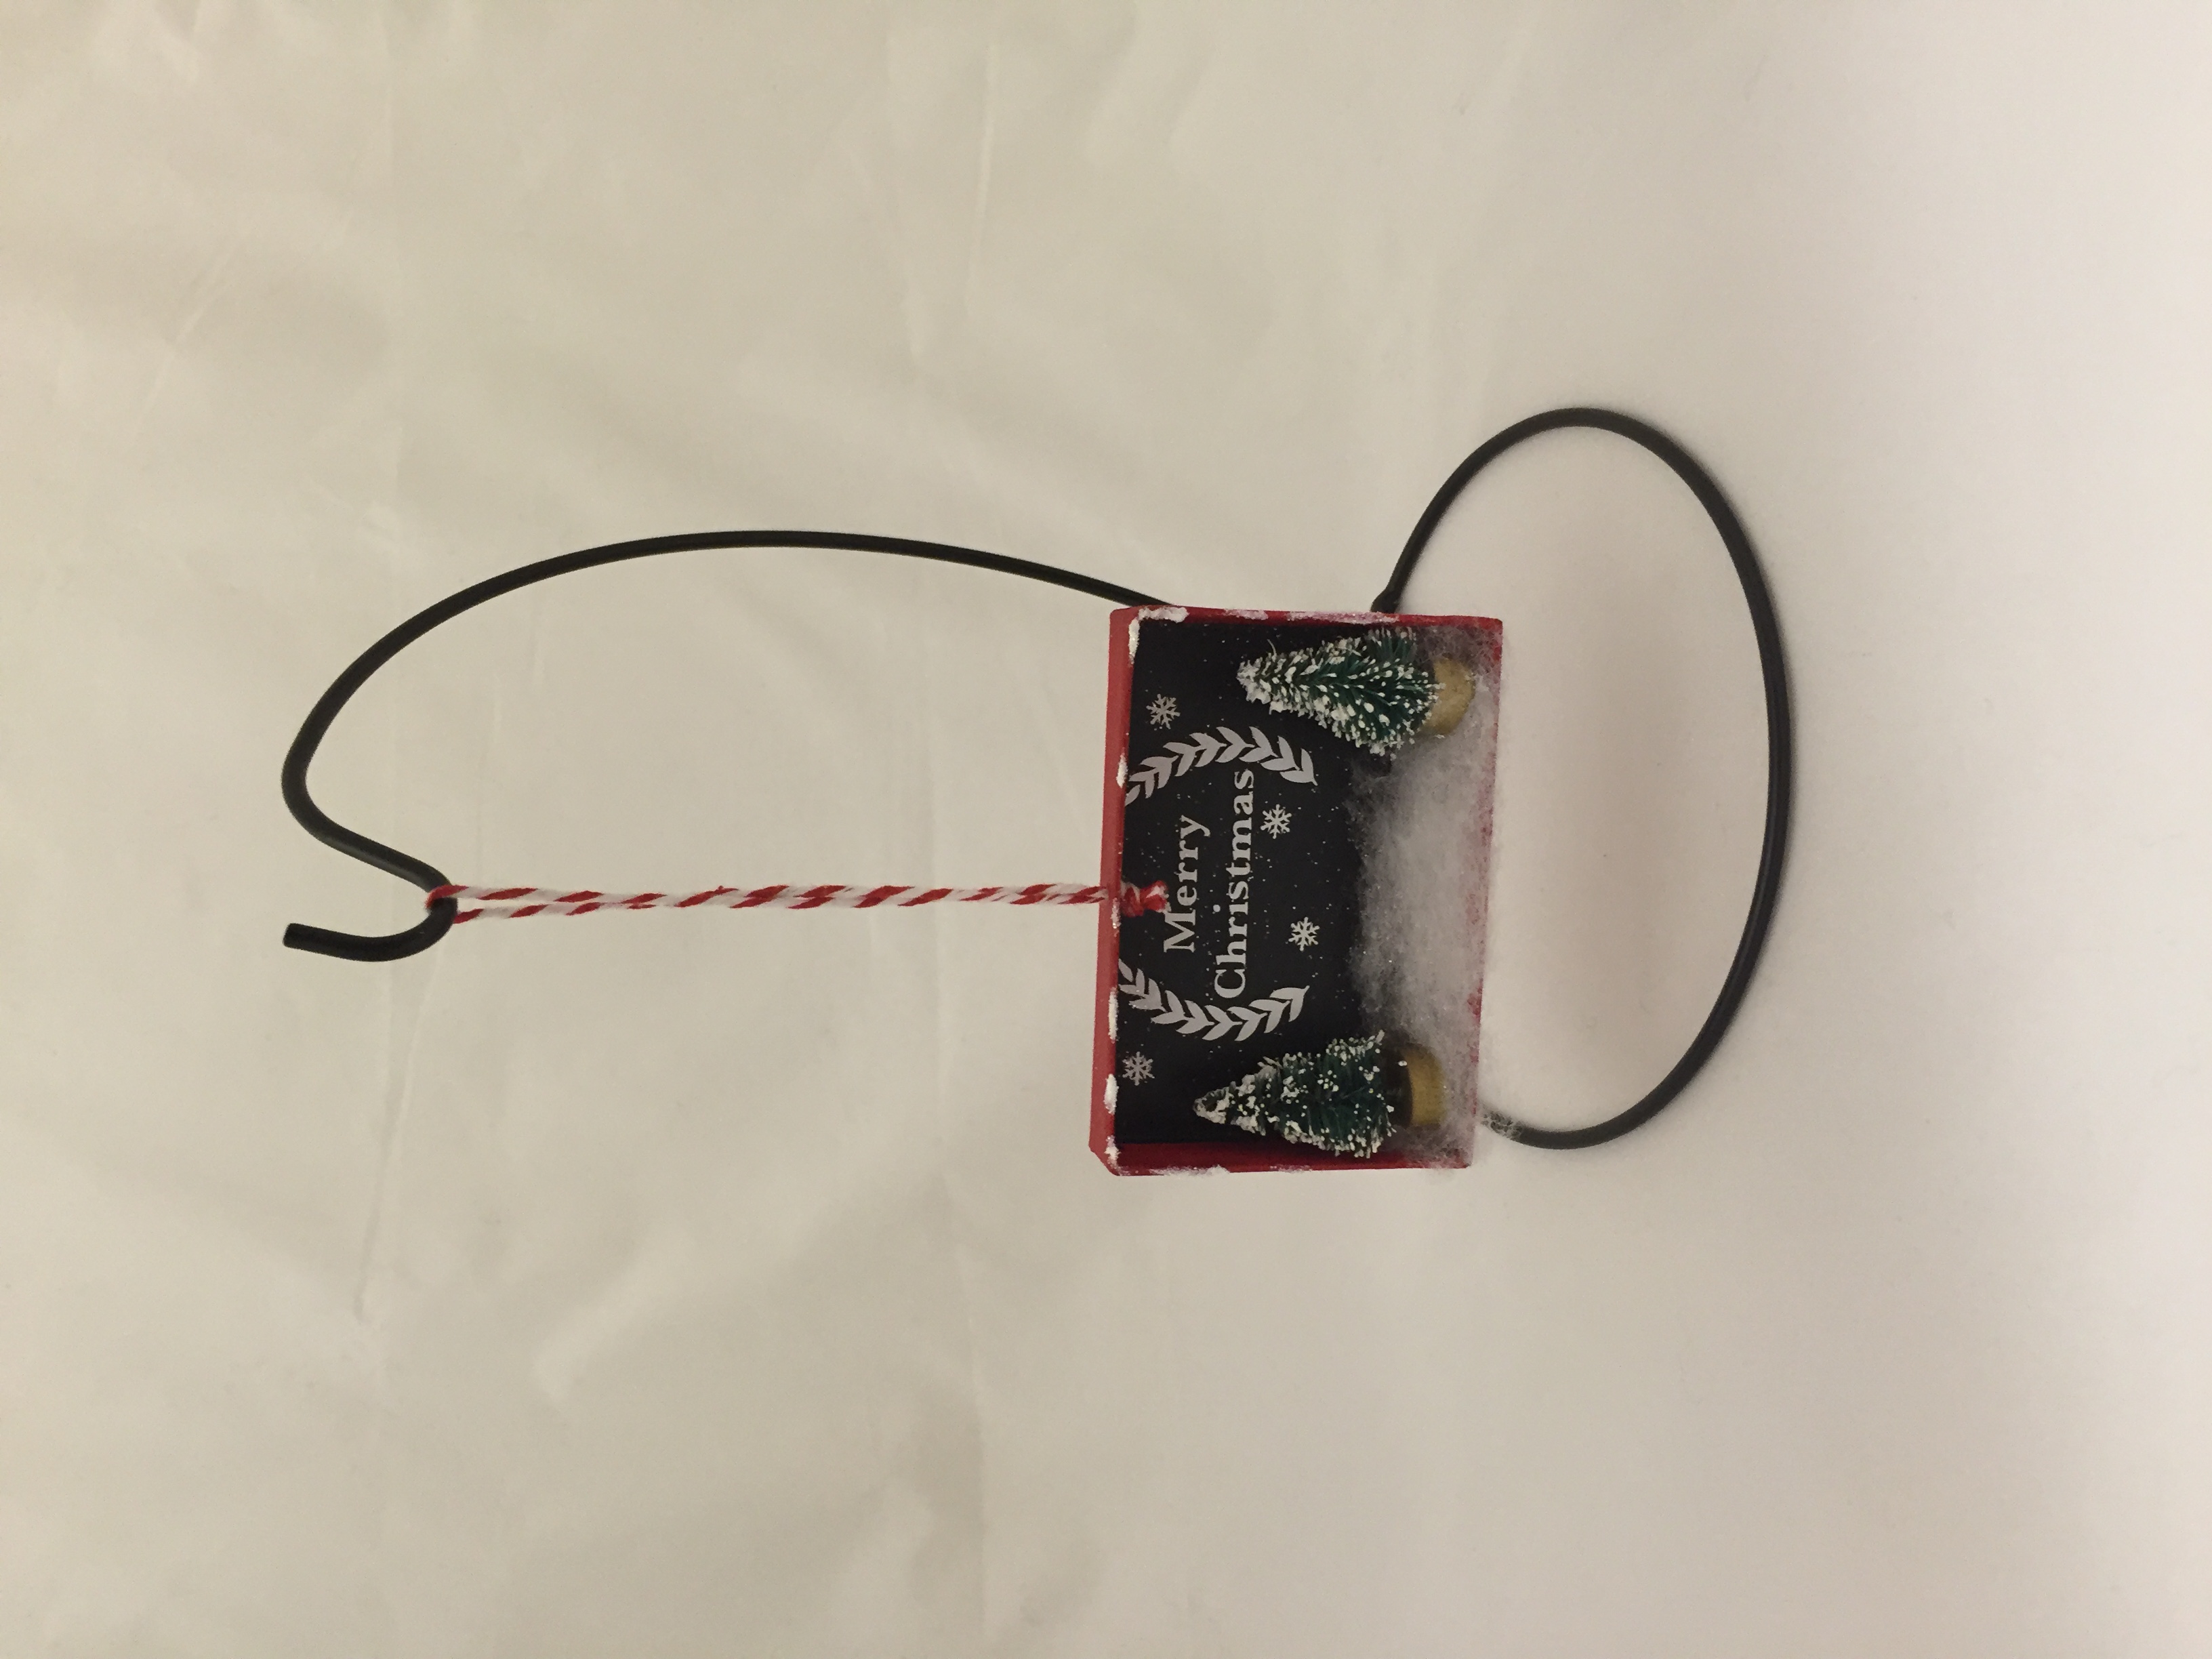
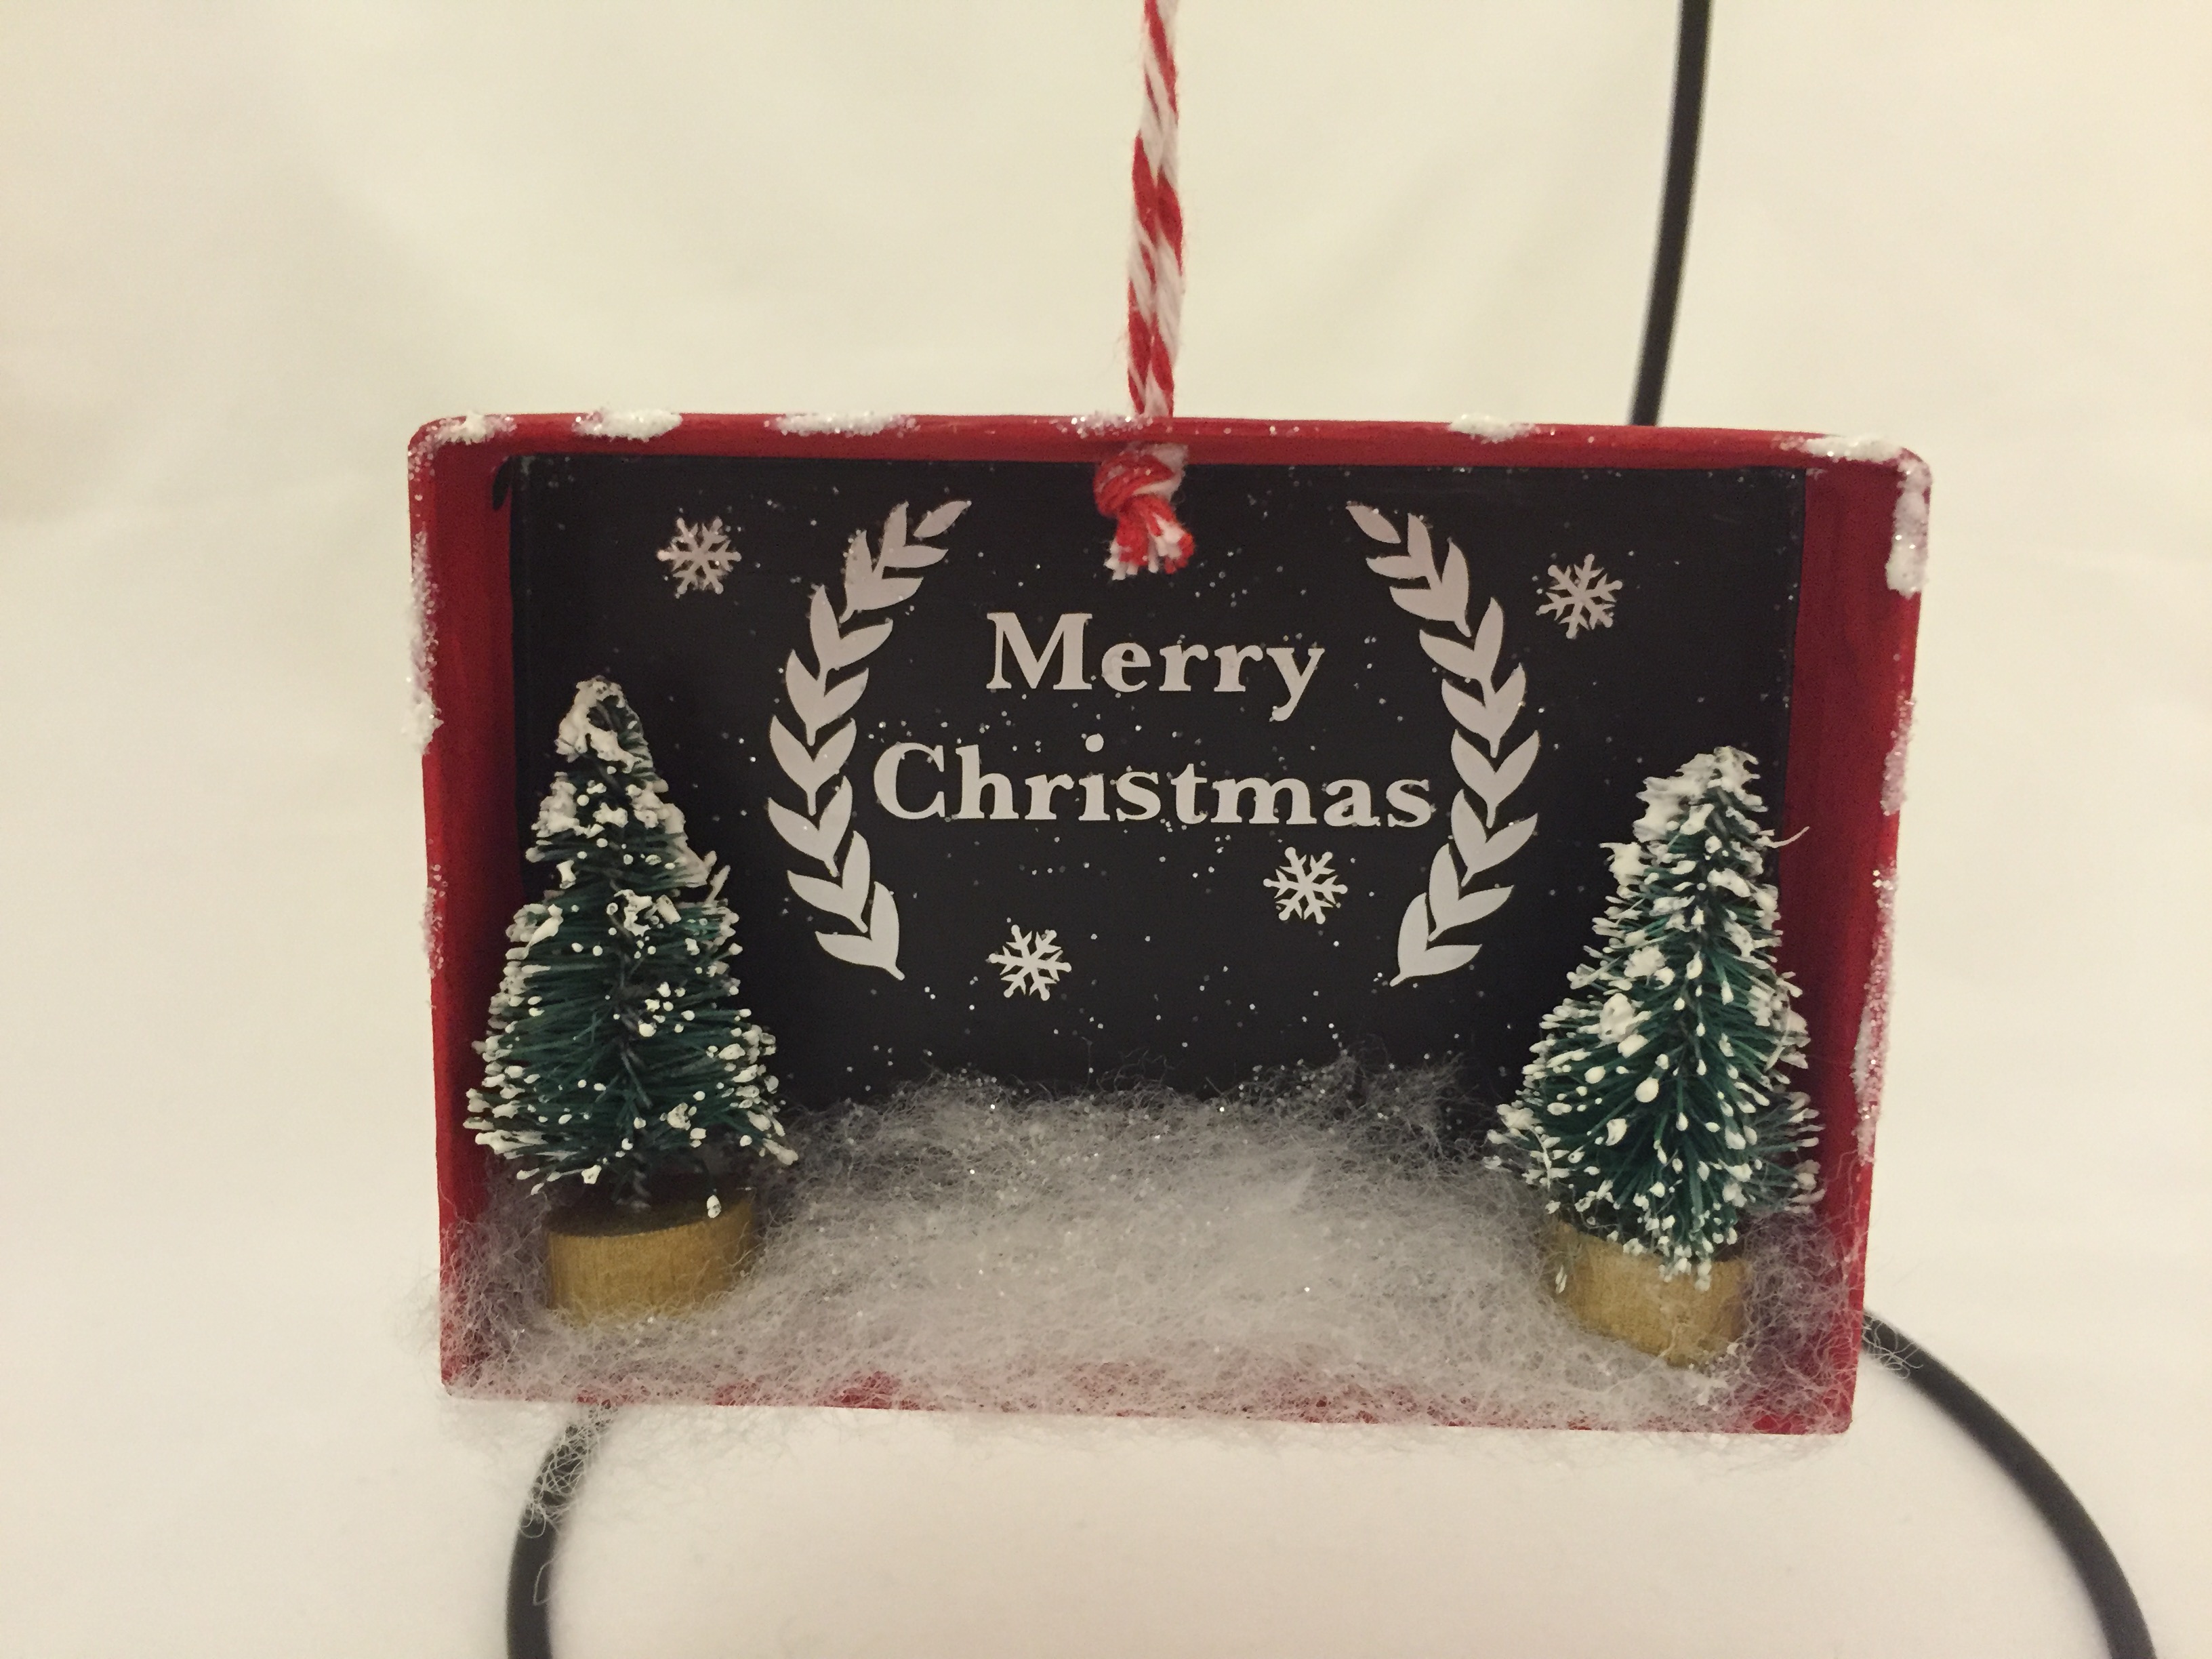
Once the chalk paint was dry, I cut the “Merry Christmas” and the snowflakes out of white vinyl using my Silhouette Cameo and applied them to the black background. I don’t have a very steady hand and my handwriting is atrocious, so I opted to not use the chalk pen. 🙂

At this point, I flew through the rest of the ornament assembly because I was so excited to see it complete! To finish it out, I took a small hole punch to the top to have a place to feed the bakers twine through in order to hang the ornament from the tree. Then, I glued down the cotton batting and the trees and sprinkled some white glitter on the snow for a little extra dimension. I also dabbed some glue around the outside of the box lid and put the white glitter on that as well. And that’s it! Here’s the completed ornament!
I’m so happy with how this turned out, that I made myself one too!
This was such a fun way to get excited for the holiday season and a great way to meet other bloggers! I can’t wait to see all of the other ornaments out there posted by others participating in the 2015 Ornament Exchange!
See this post linked up at: