Fall One Room Challenge: Week 6 – The Reveal
It is finally here…the end of the one room challenge. This truly has been a challenge for me because I took on probably more than I should have in the time allotted and I had no help. During the entire One Room Challenge, my husband has been out of the country on business travel, so I’ve had to do this all by myself. Normally, this isn’t something that I would call out, but let me tell you, some of the things I managed to do really required two people, so doing it alone was harder than it should’ve been.
Let’s take a quick trip down memory lane to refresh your memory as to what the room looked like before the ORC started. The space I chose for this ORC was our sitting room/dining room. We knew even before we signed the papers to start building that we wouldn’t use this room as a dining room, we just didn’t know how it would be used. Over time, we realized that we’d like a fairly formal sitting room that we could use to sit and talk or visit with guests. Oh, and it also needed to be able to double as a sleeping space for guests. Not really something that seems like it would fit well in a sitting room, but I knew I had to make it work. So, here’s what the room looked like before I started the ORC.
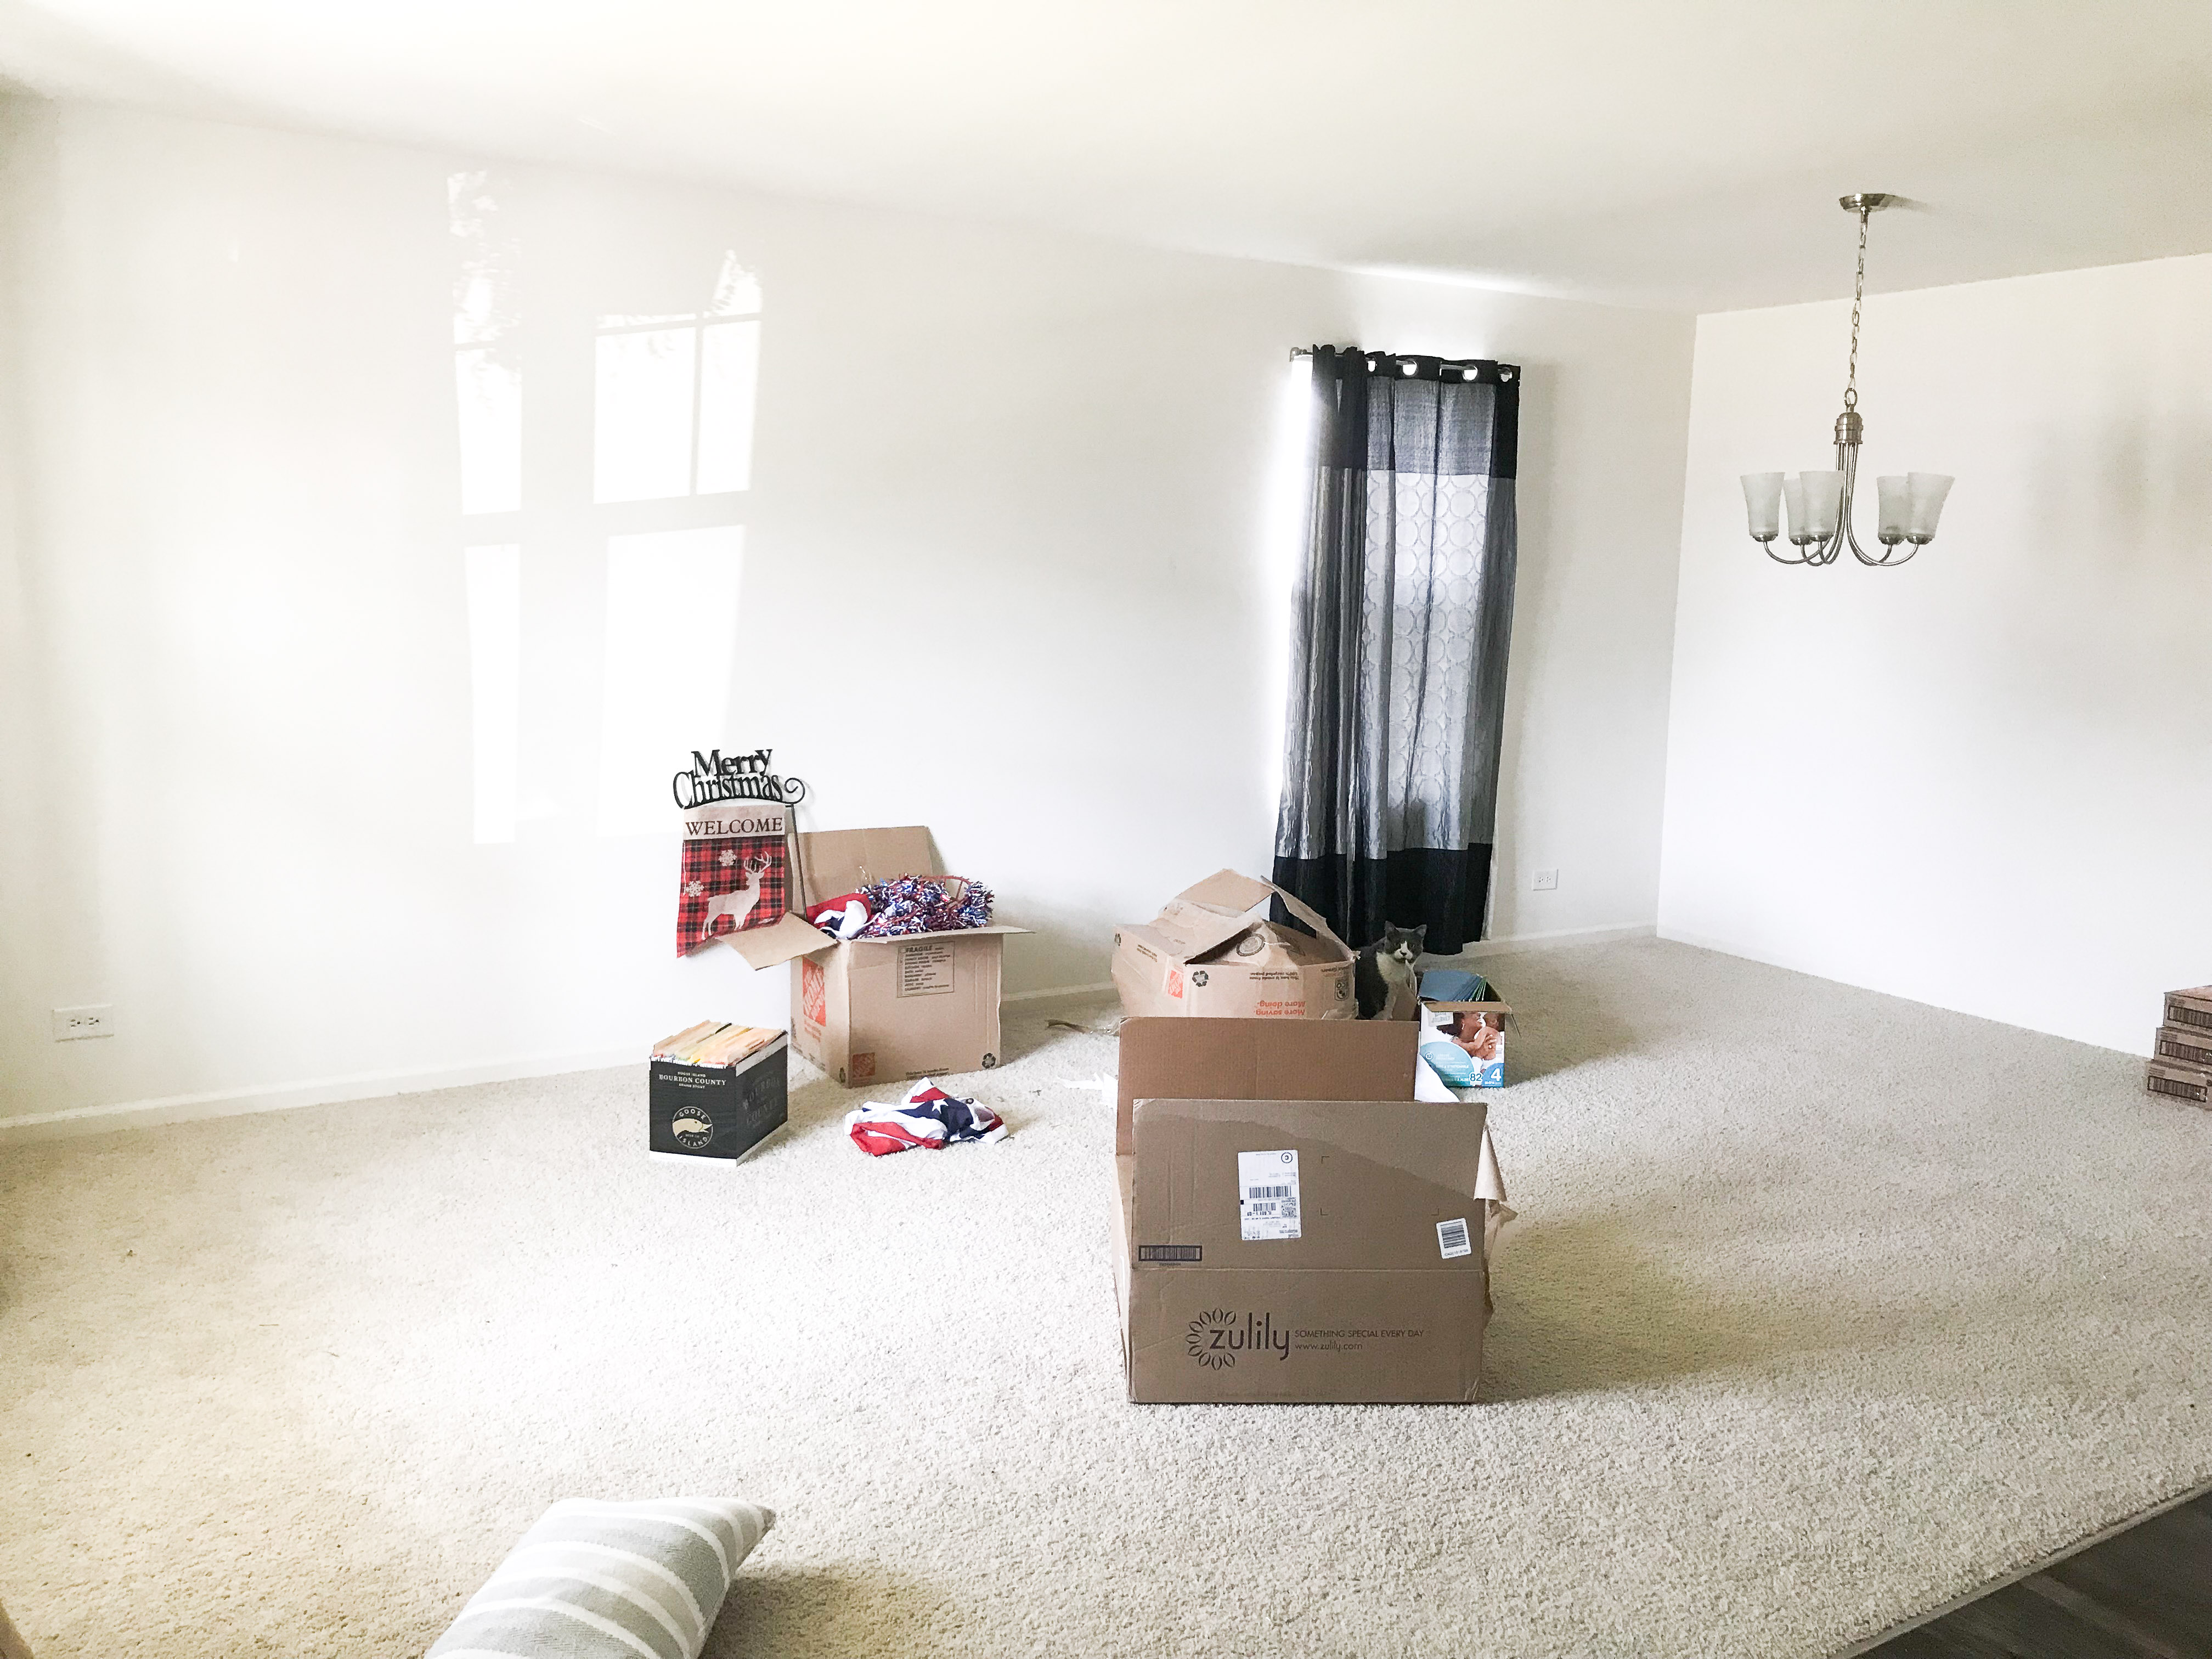

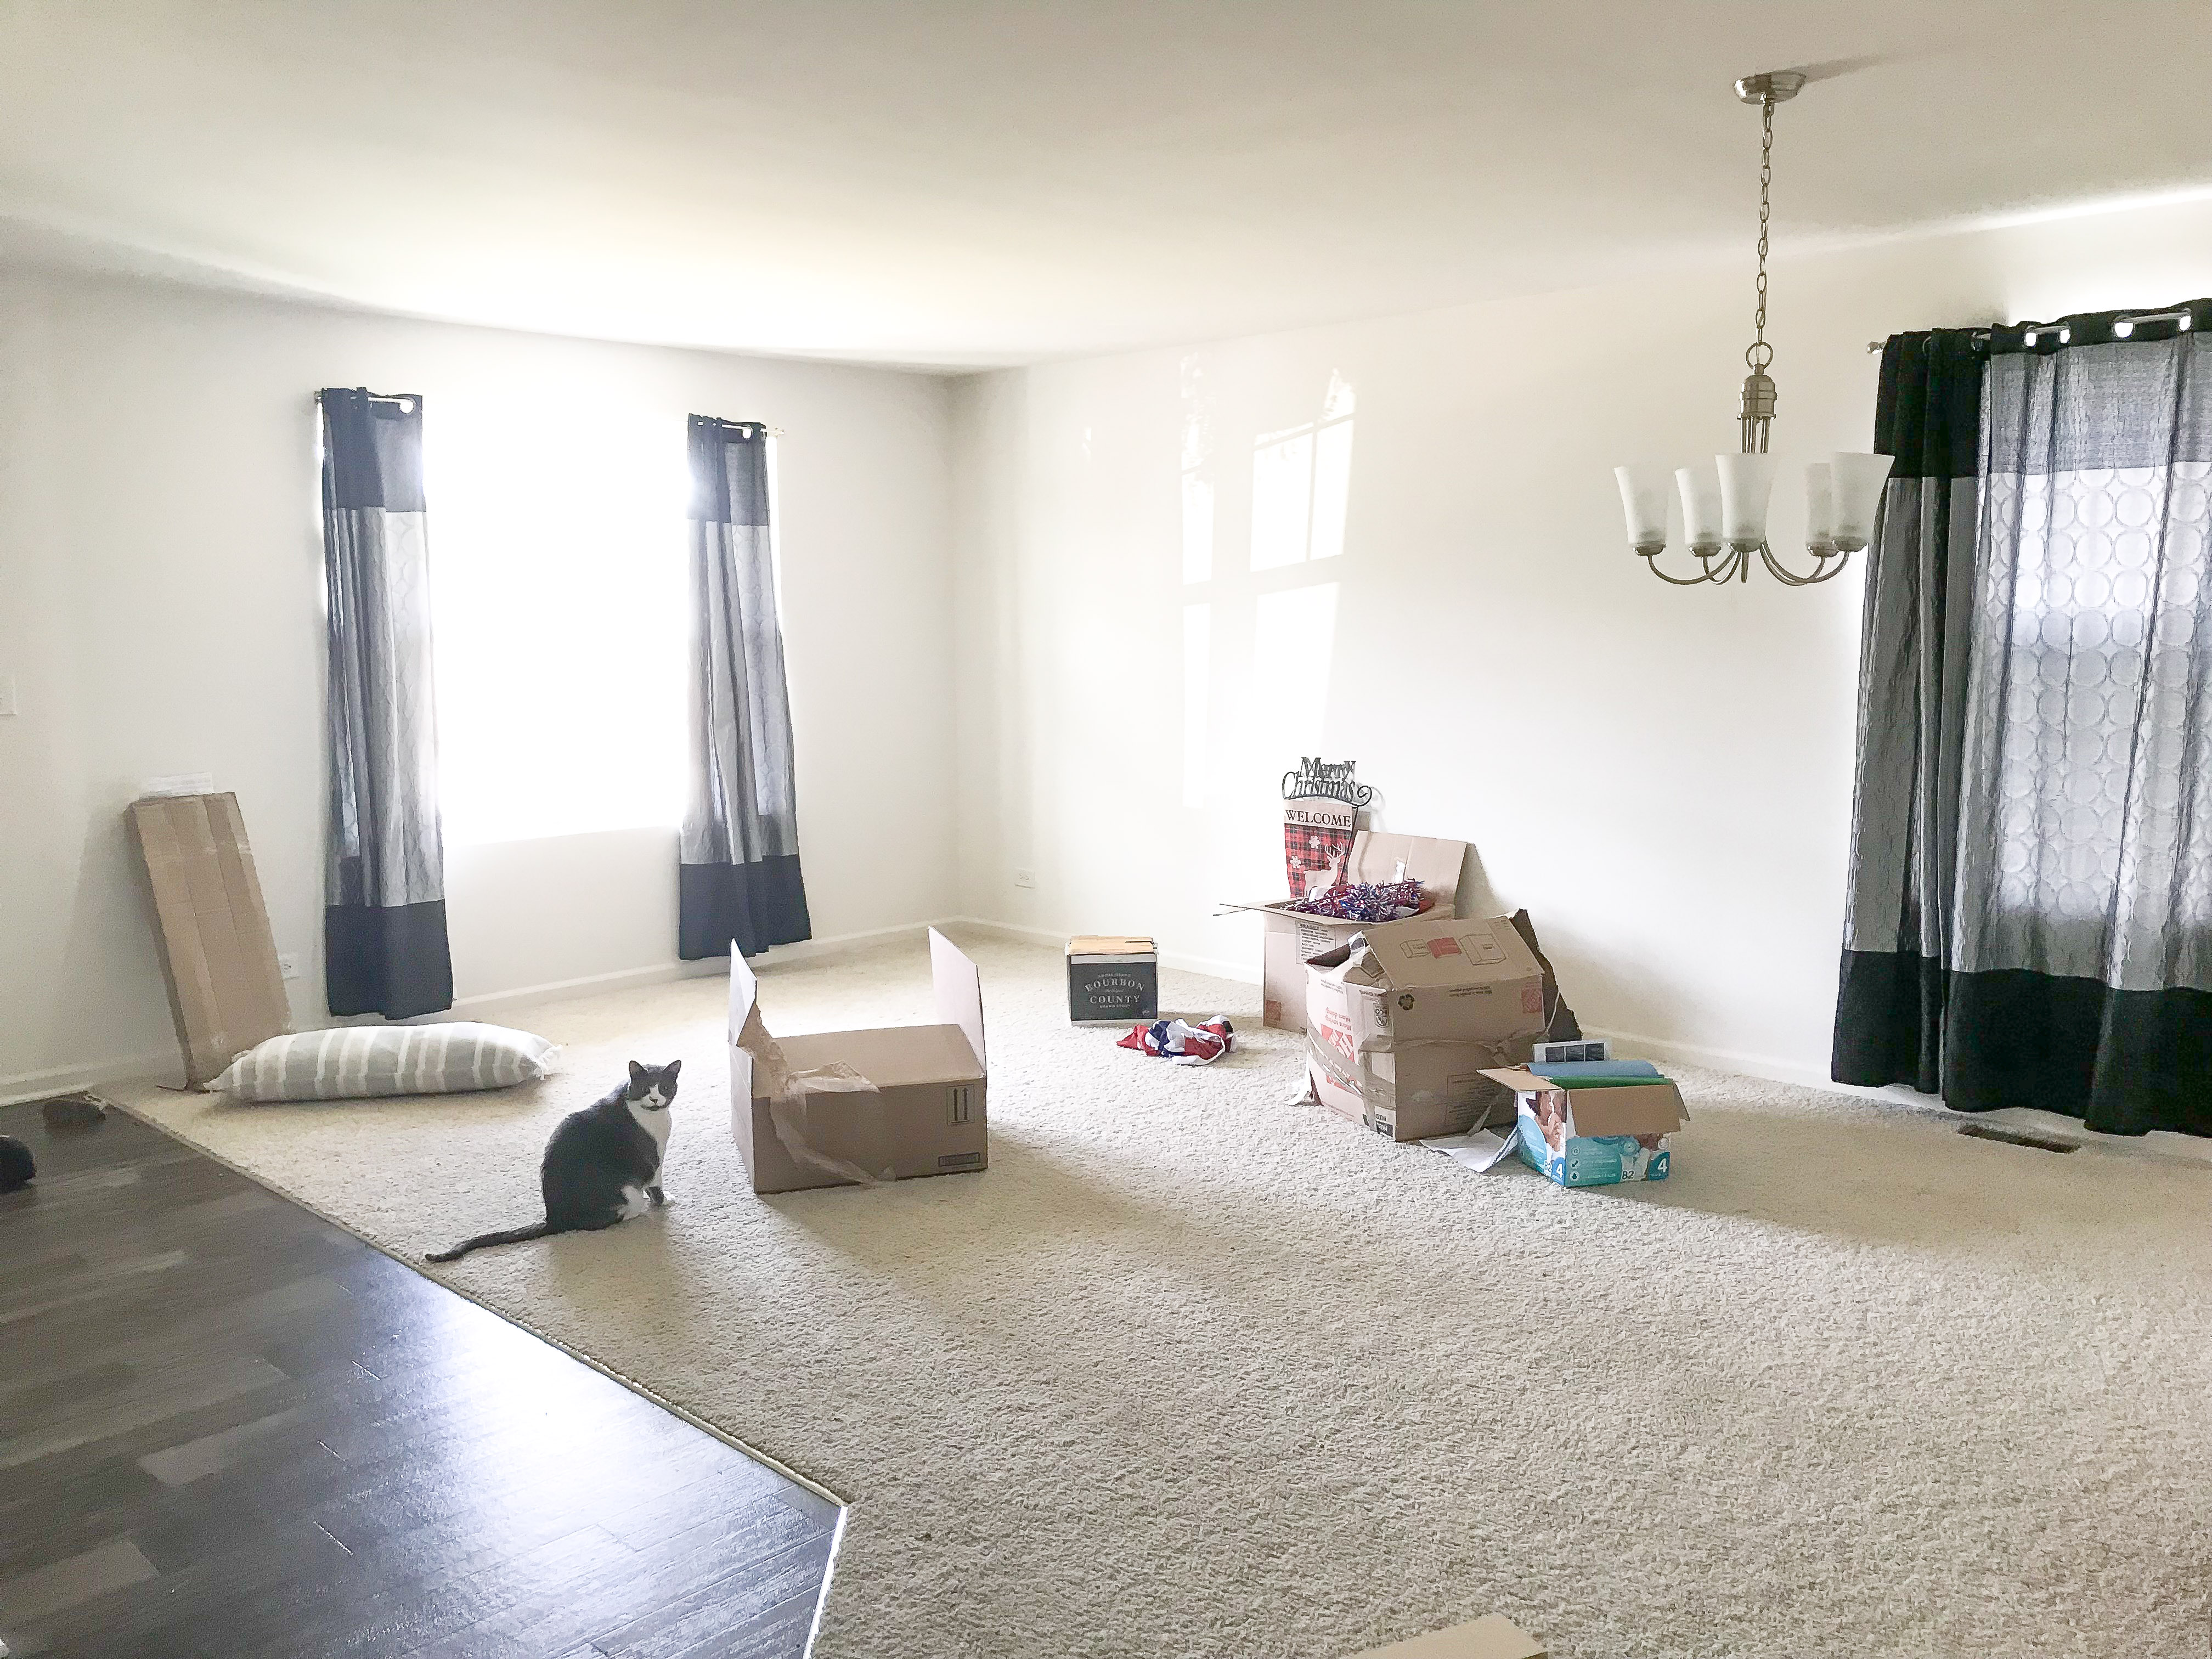
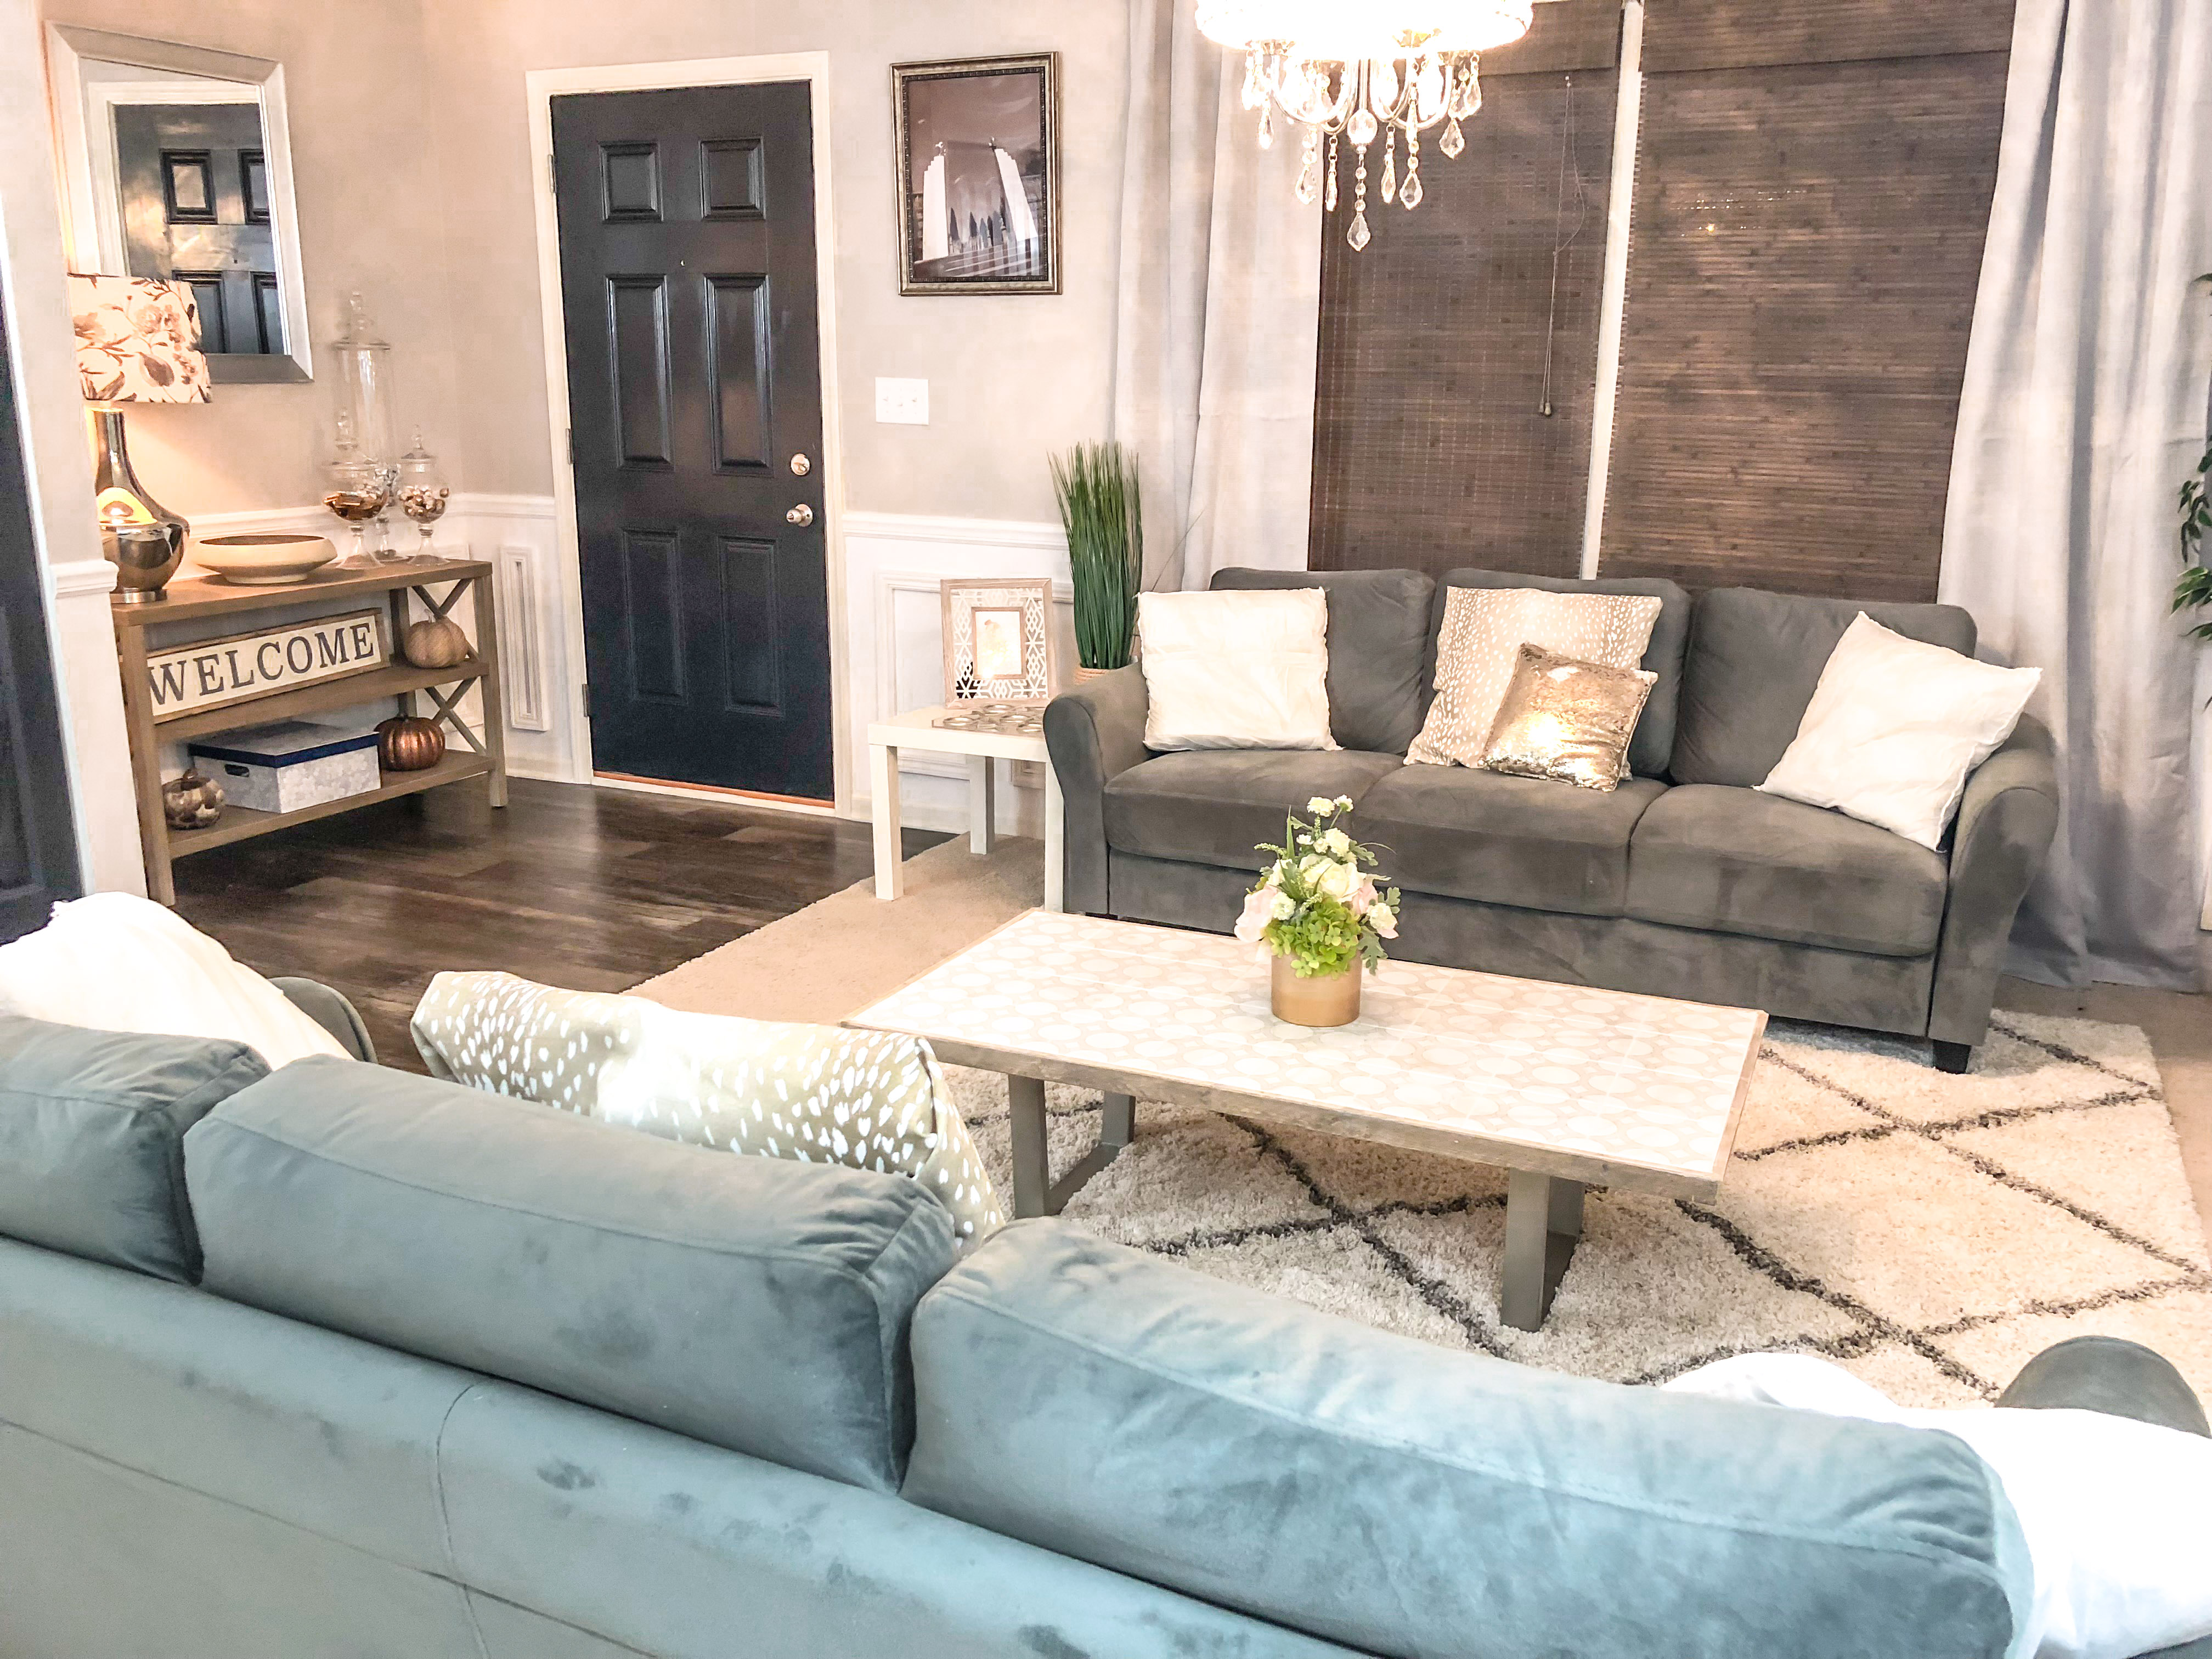
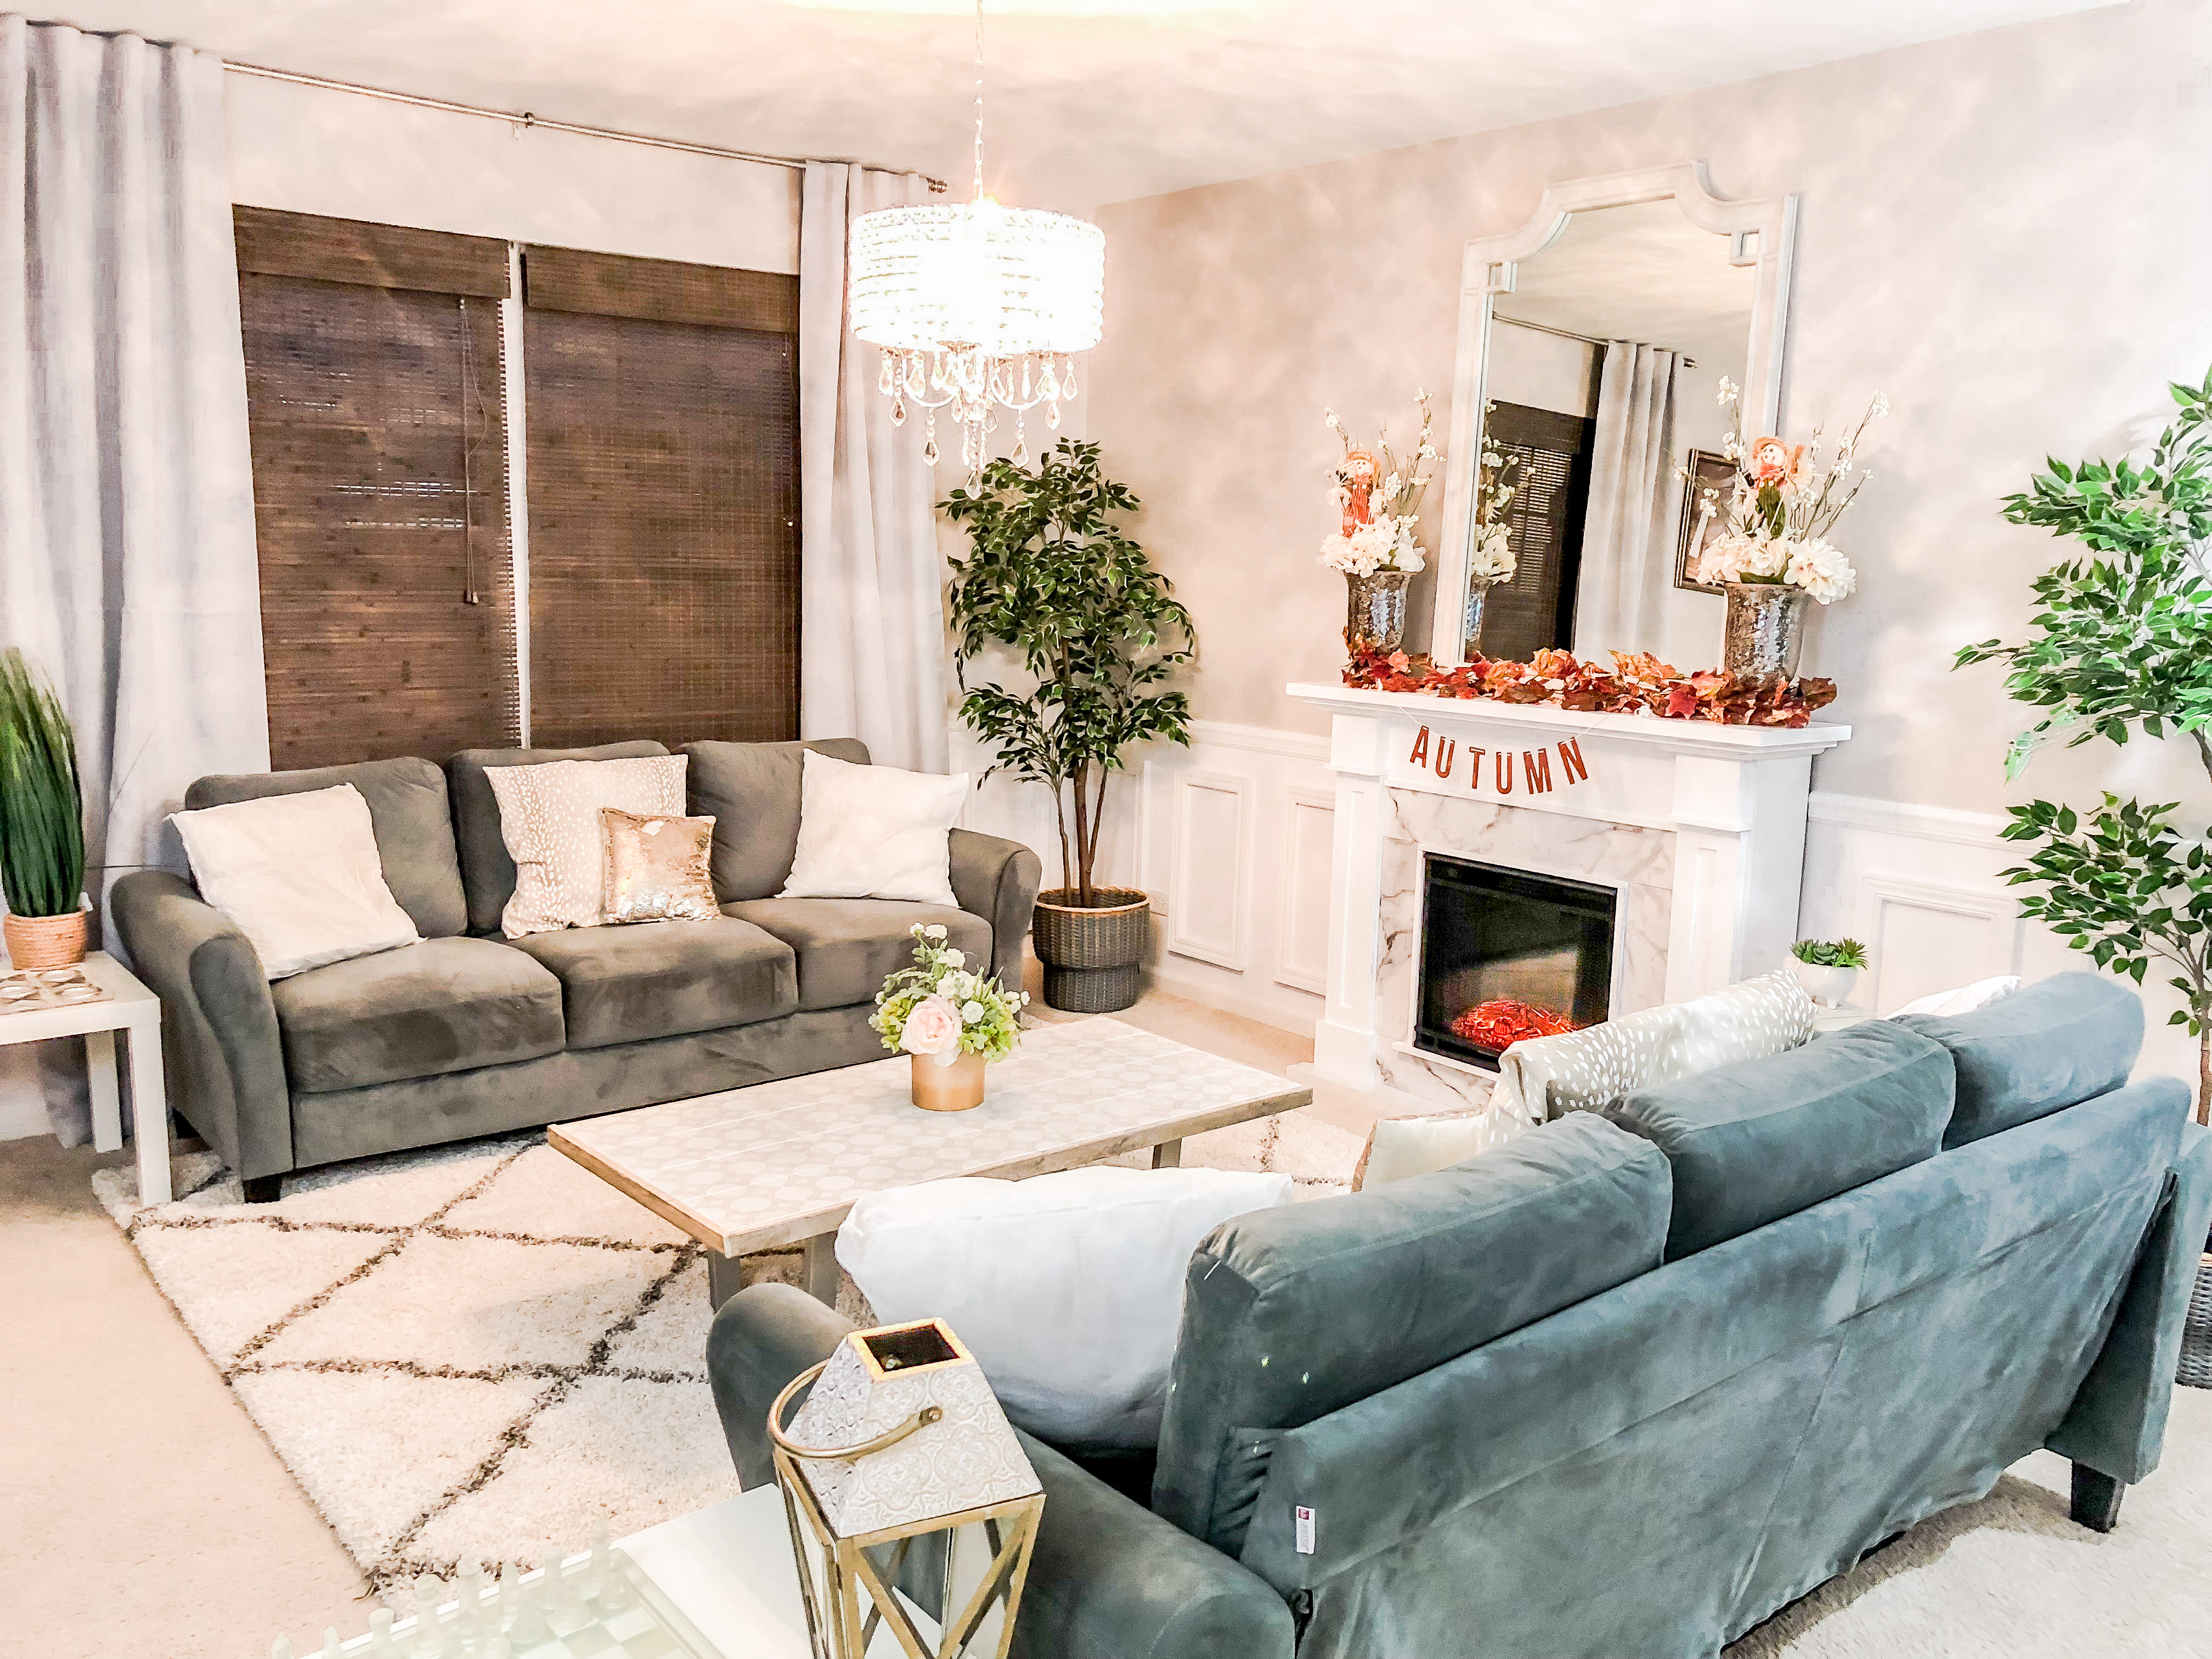
Nothing about this room was special. It was bare and super white with no character. So obviously my plans were to change all that and make this room a cozy, inviting space that we would be happy to entertain guests in.
The Murphy Bed and Built-In Bookcases
So when I said I really needed another person to help with aspects of the room, the Murphy bed and built-in bookcases were really what I could’ve used another hand for.
The bookcases are the BILLY bookcases from Ikea, with height extenders on top and doors on the bottom half. The bookcases weren’t difficult to put together, but getting them aligned and perfectly spaced was a little rough by myself. Because I intended the bookcases to look built-in, I also needed to place wood between them to connect them together to provide a more “built-in” look, as well as trim along the top to connect it to the ceiling.
The Murphy bed… This was seriously the hardest project I’ve ever done. This wasn’t just a Murphy bed that I ordered online and had to put together, it was a Murphy bed kit that only consisted of the hardware and frame. The rest of the bed I had to make myself. Luckily, the wonderful folks at Home Depot helped with cutting pieces of plywood for me to the widths that I needed to make the actual unit that houses the bed. While I’m sure they would’ve also cut the pieces to length as well, that would’ve made for a lot of work for them, so I opted to just bring it home and make the cuts myself with a circular saw.
Putting the entire bed together was a lengthy process and putting the final pieces on were honestly excruciating to try to do by myself. I’m not gonna lie – there were tears involved. I honestly thought I bit off more than I could chew, but luckily with some creative problem solving and some advanced yoga moves I managed to get it done. I have never felt so accomplished in my life. That being said, I will never build another Murphy bed alone again. 🙂
So, let me show you the splendor that is…the hardest thing I’ve ever done.
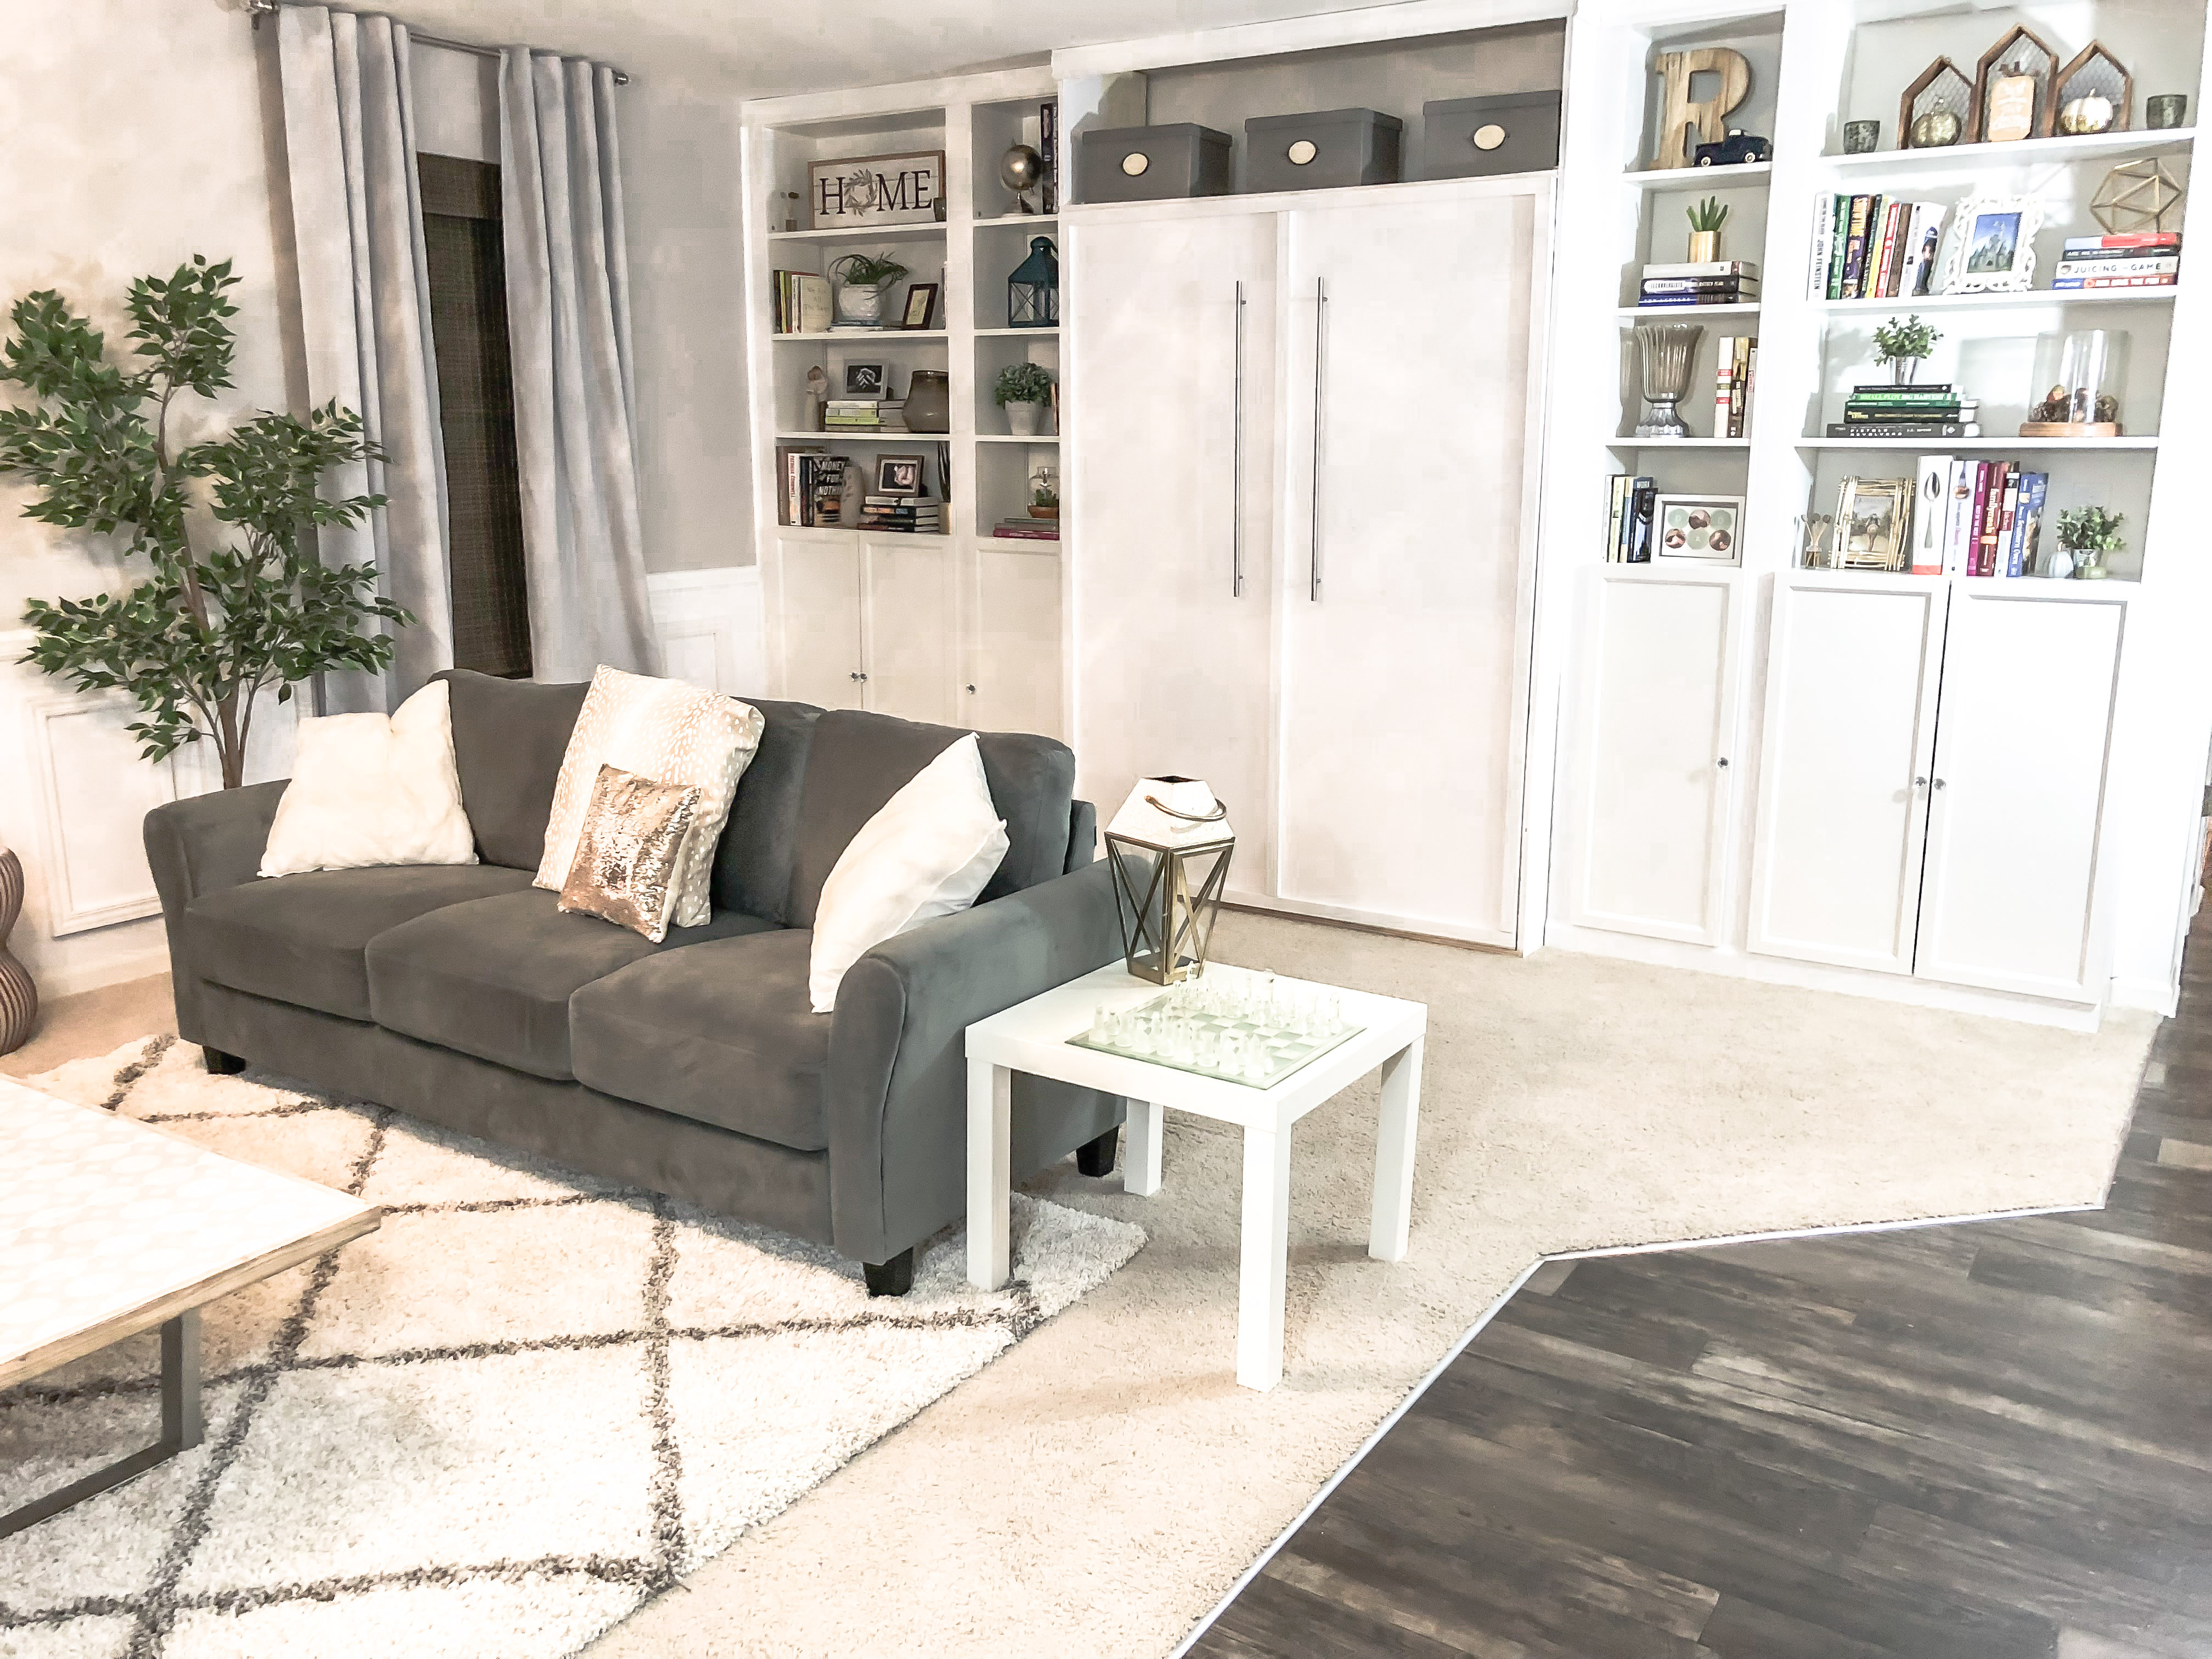


The Lighting
My husband isn’t the biggest fan of lamps and lots of lighting, mainly because I love to turn on ALL the lamps when I’m in a room just because I like them. Well, lucky for me, he wasn’t here while I was shopping for this room, so I went with lamps AND a gorgeous new chandelier! Sorry hubs! 🙂
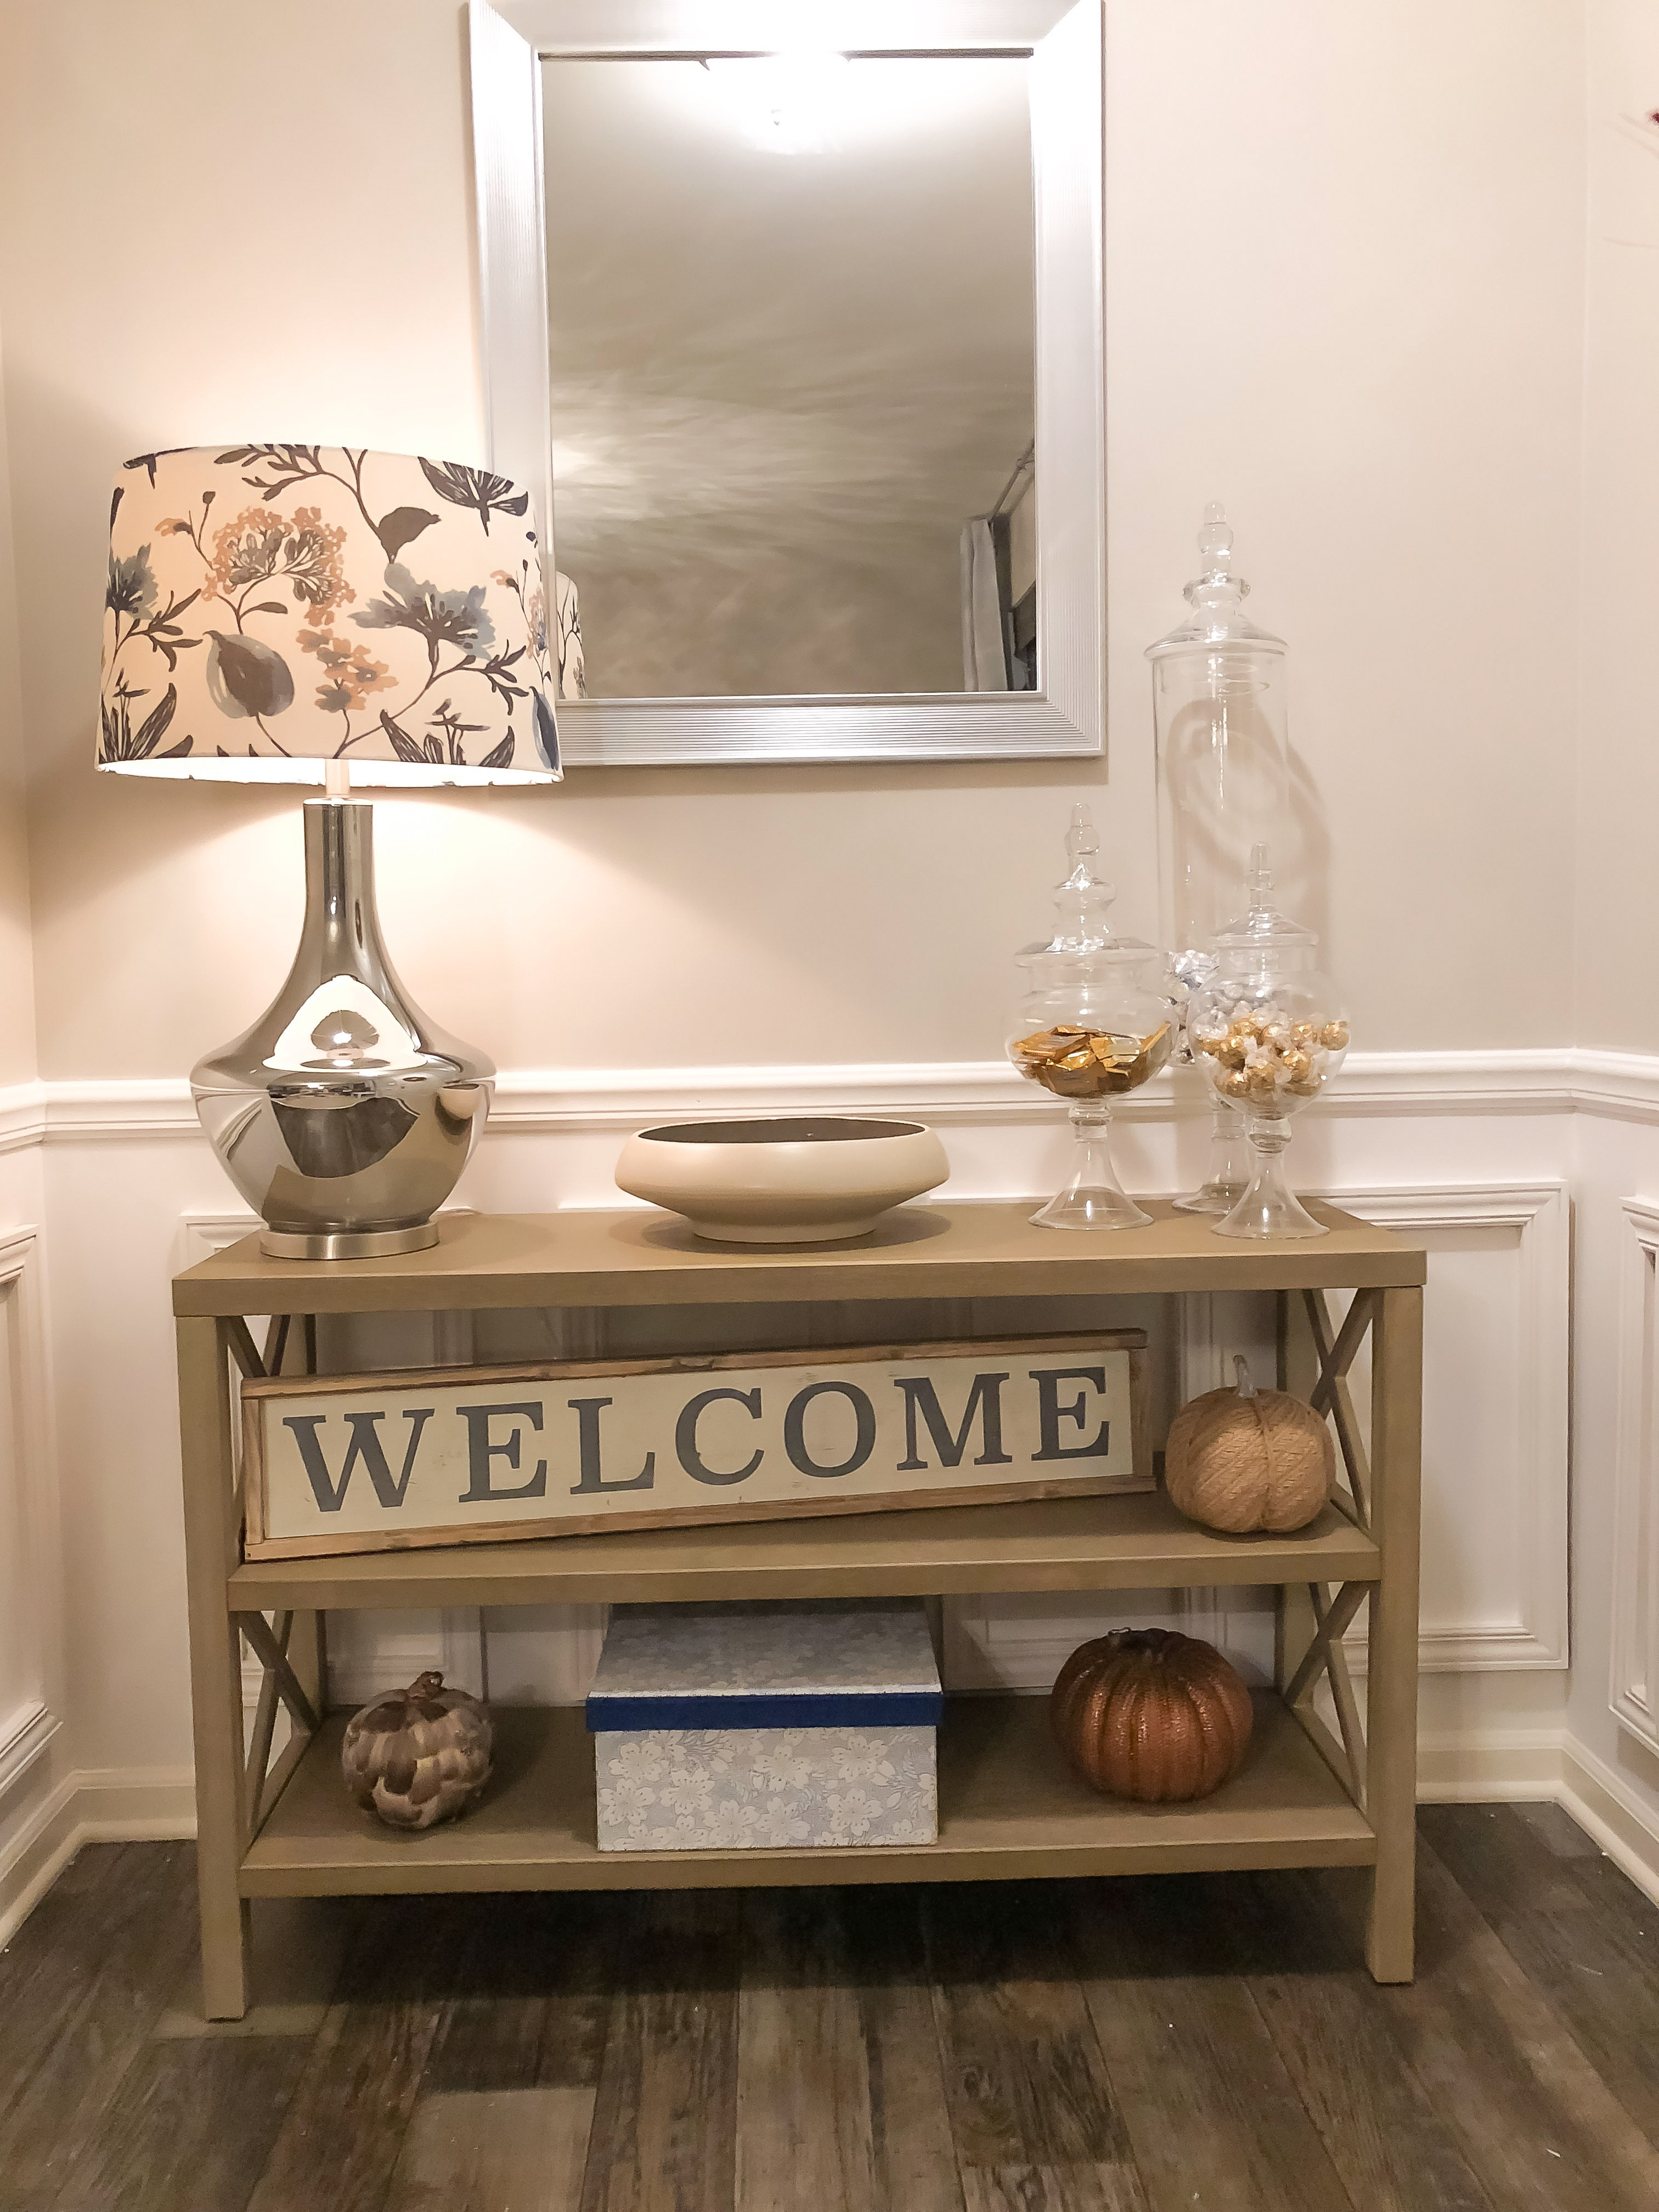
The lamps are these gorgeous HUGE table lamps from HomeGoods that to be honest, I hated when I first saw them. But as I walked through the store I kept thinking about those awful, giant lamps. So, I went back and seriously studied them for like 10 minutes contemplating if they’d fit in the room the right way from a design perpective, if they’d fit on the table, if they’d be too big and dwarf other items on the table or the mirror hanging beside, etc… Yeah, I bet you never imagine anyone could have so many thoughts about a lamp. 😛 Well, I ended up taking them home with me and I couldn’t be more happy! They look AMAZING in the space and are actually just the right size considering the overall size of the room. They give off very dim, warm light and just make the room feel warm and cozy.


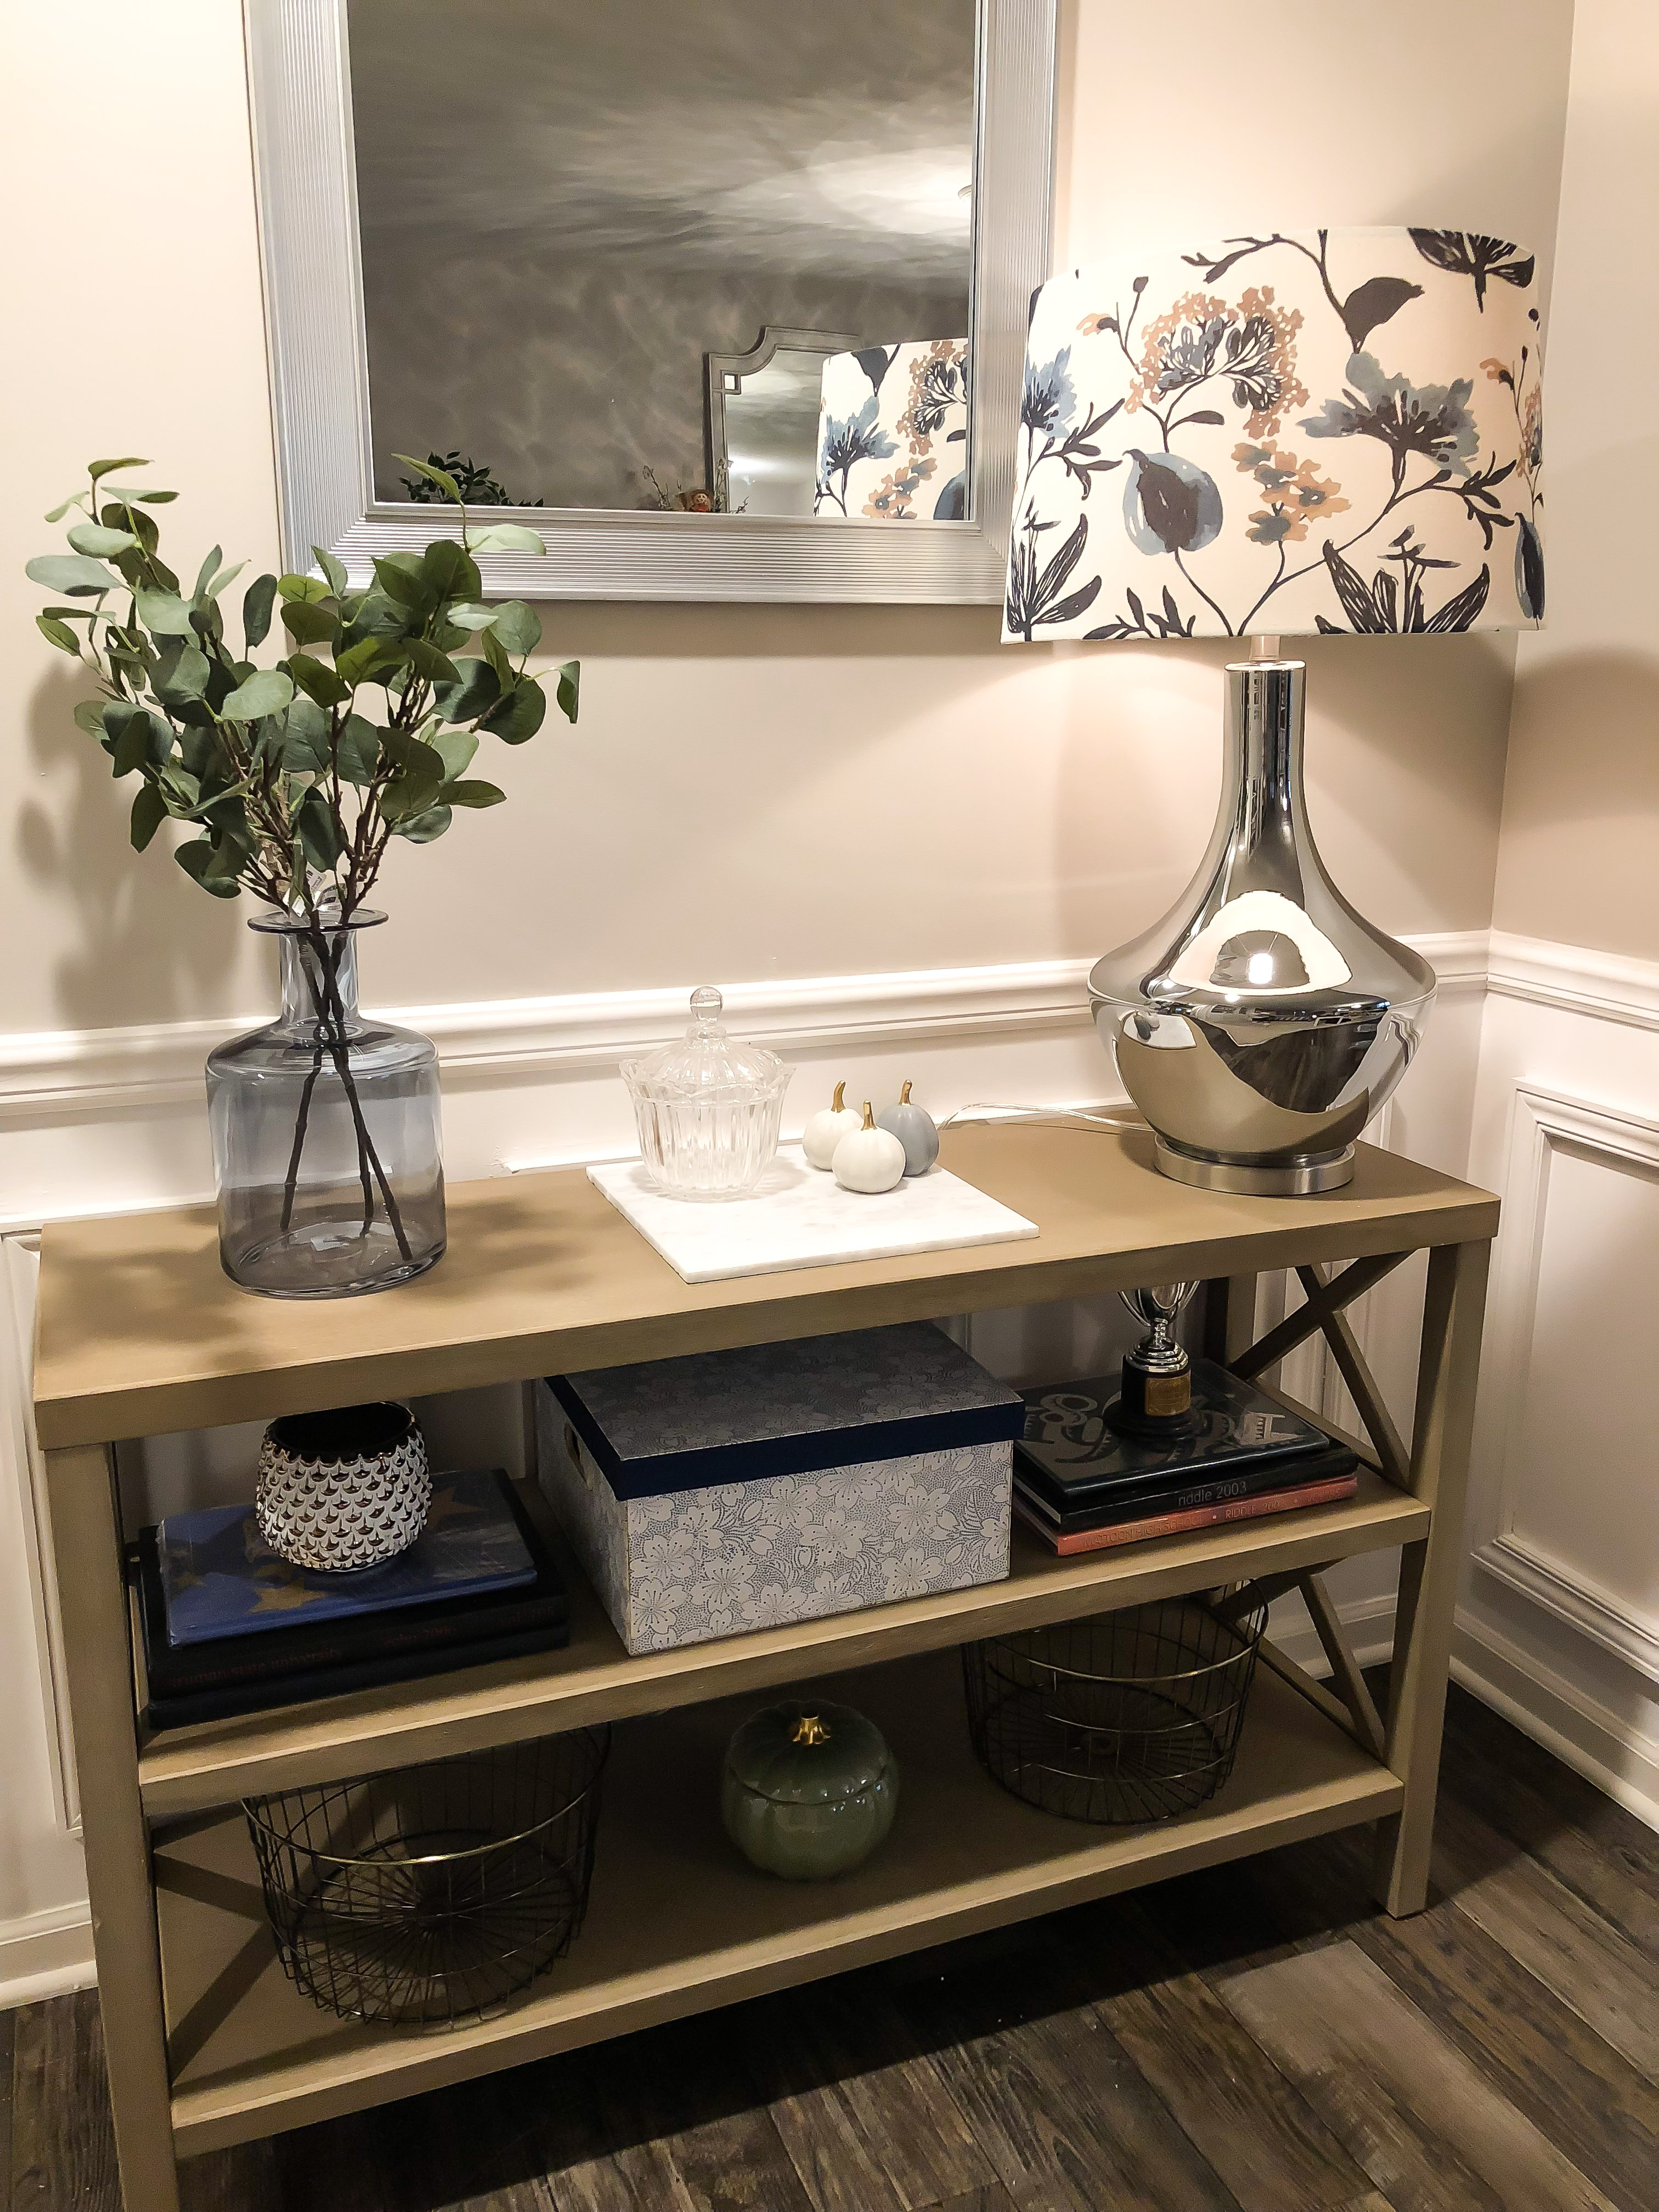
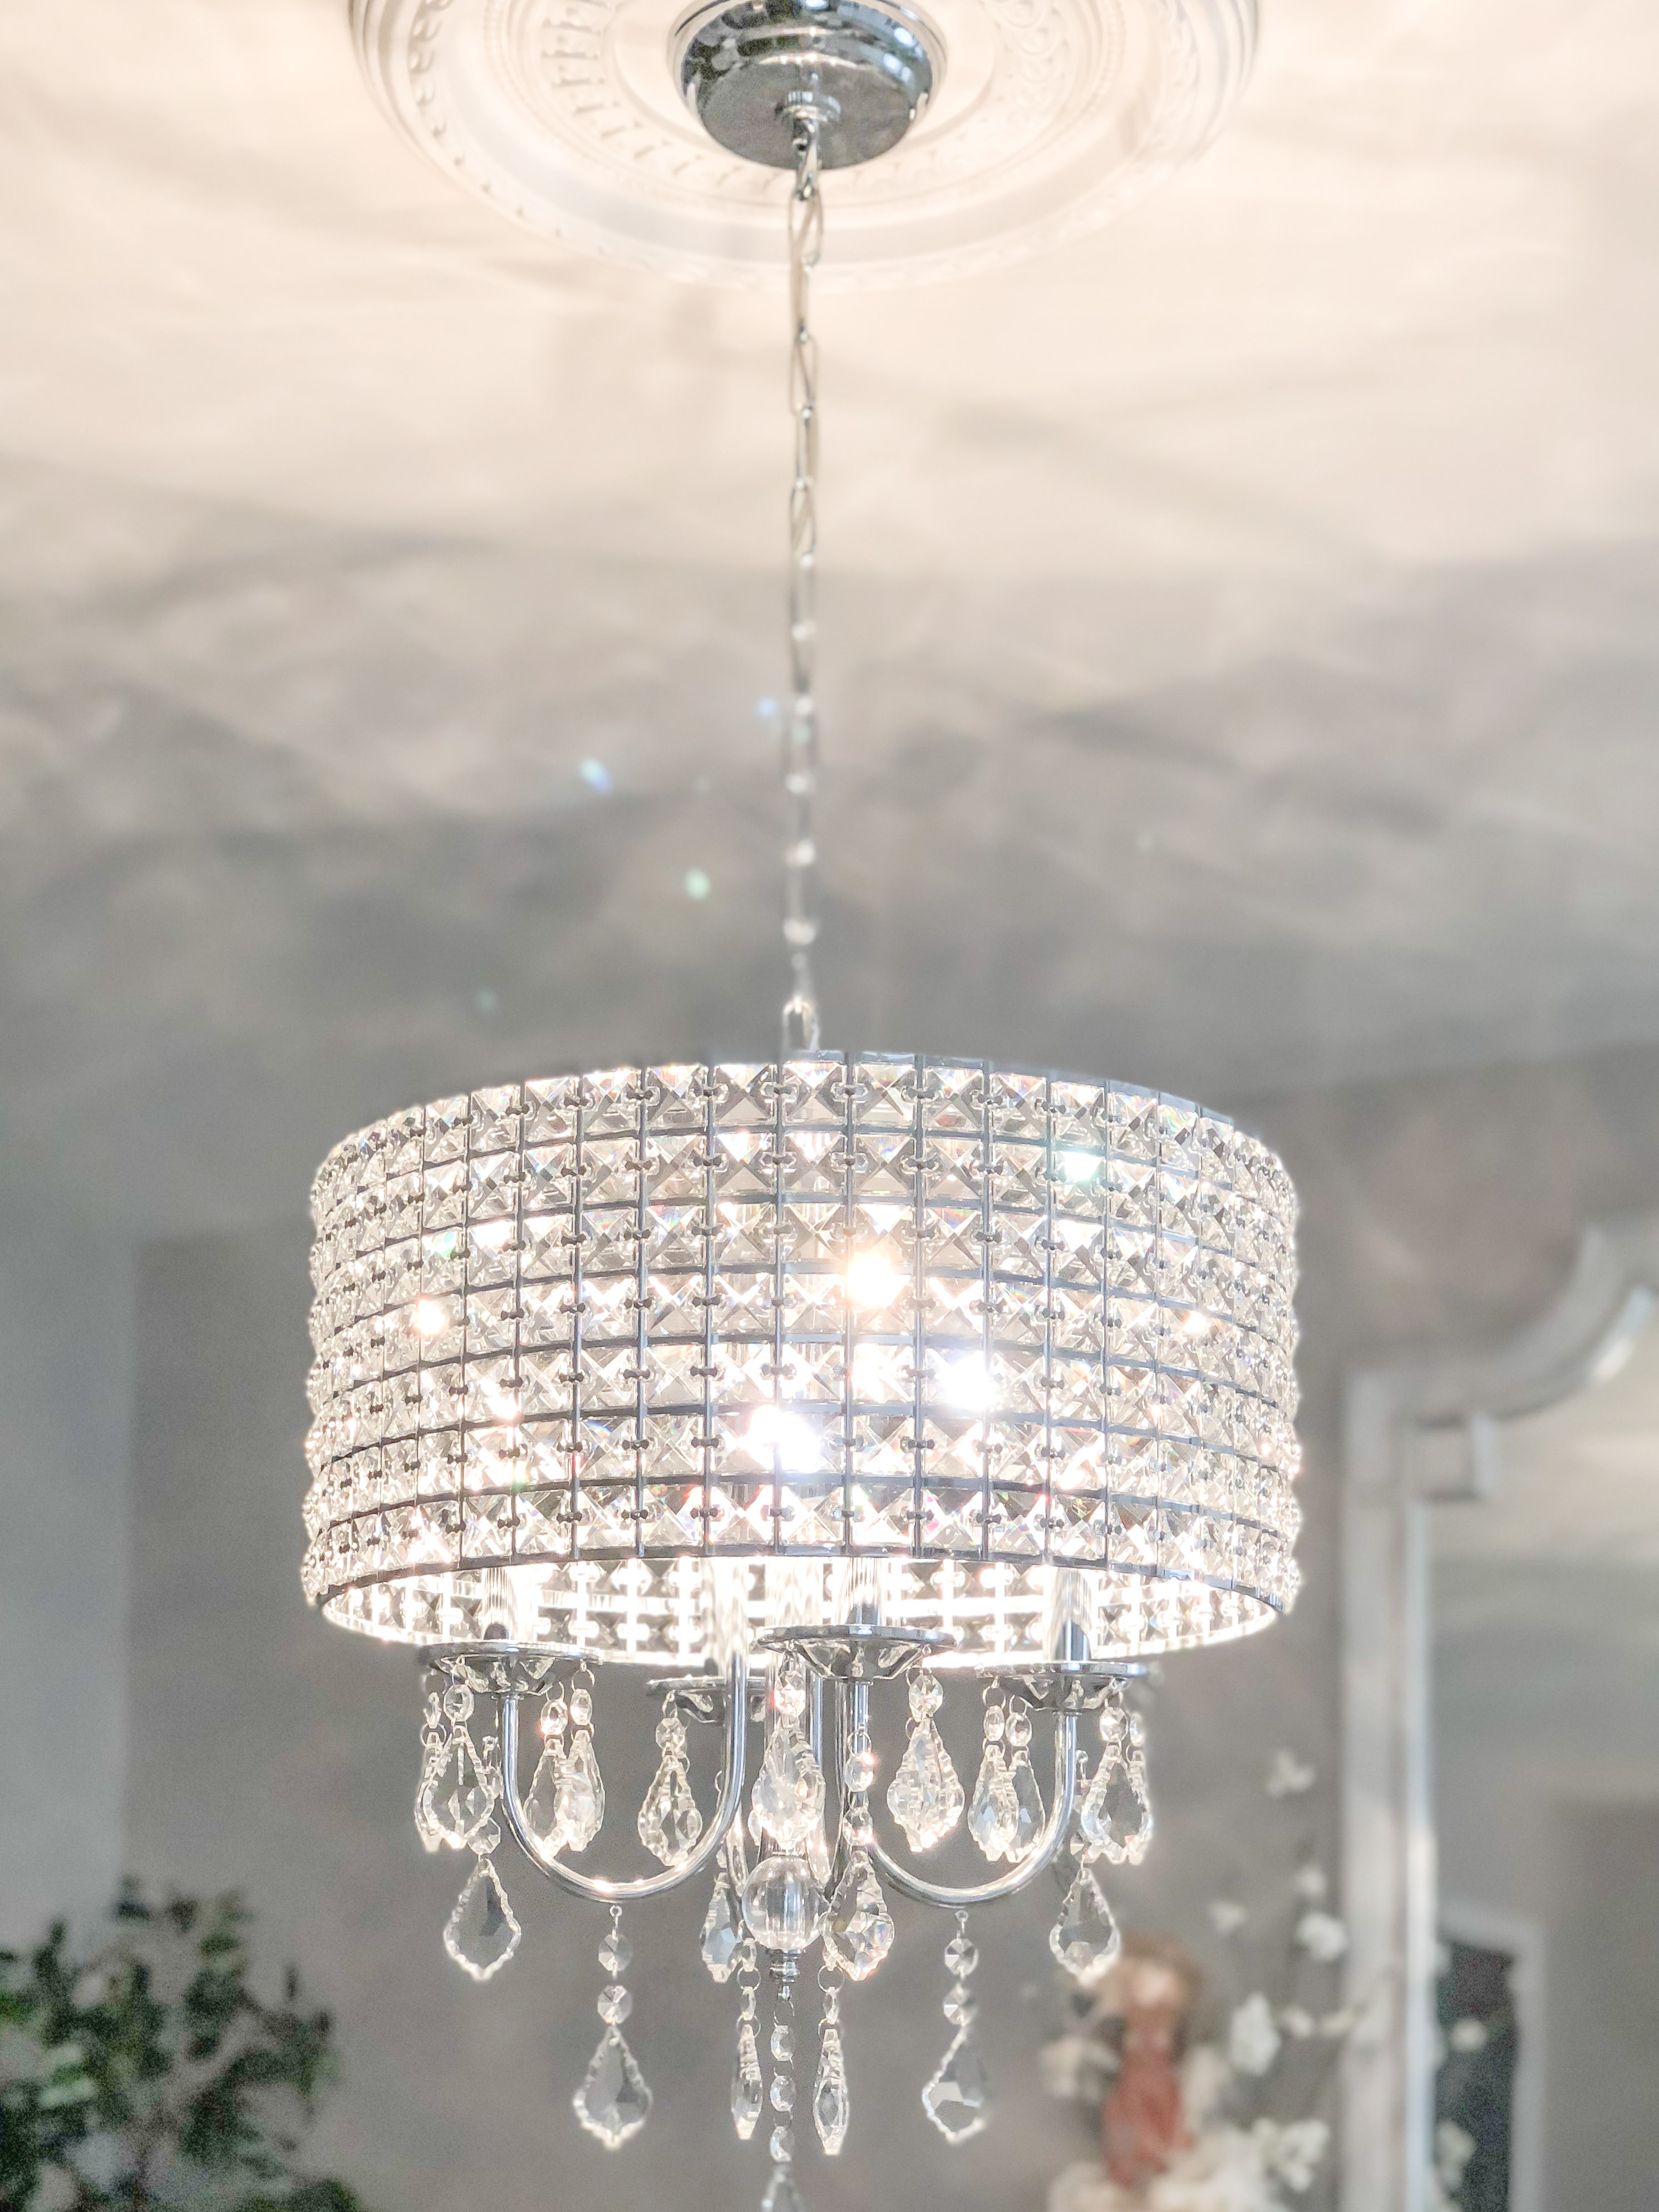
Now, while I love my lamps, I am completely OBSESSED with my chandelier. I knew I wanted a light in this room that would make a statement since it’s the first thing you see when you walk in the front door. It took me two weeks to narrow down my chandelier selection enough to finally decide on this one. Clearly, lighting is something I put a lot of thought into! 😛
This light is from Wayfair.com and was really relatively inexpensive for the size and amount of detail. I also decided to add a ceiling medallion where the light hangs because I’ve always loved the look of them. And, it didn’t hurt that it was only like $12!

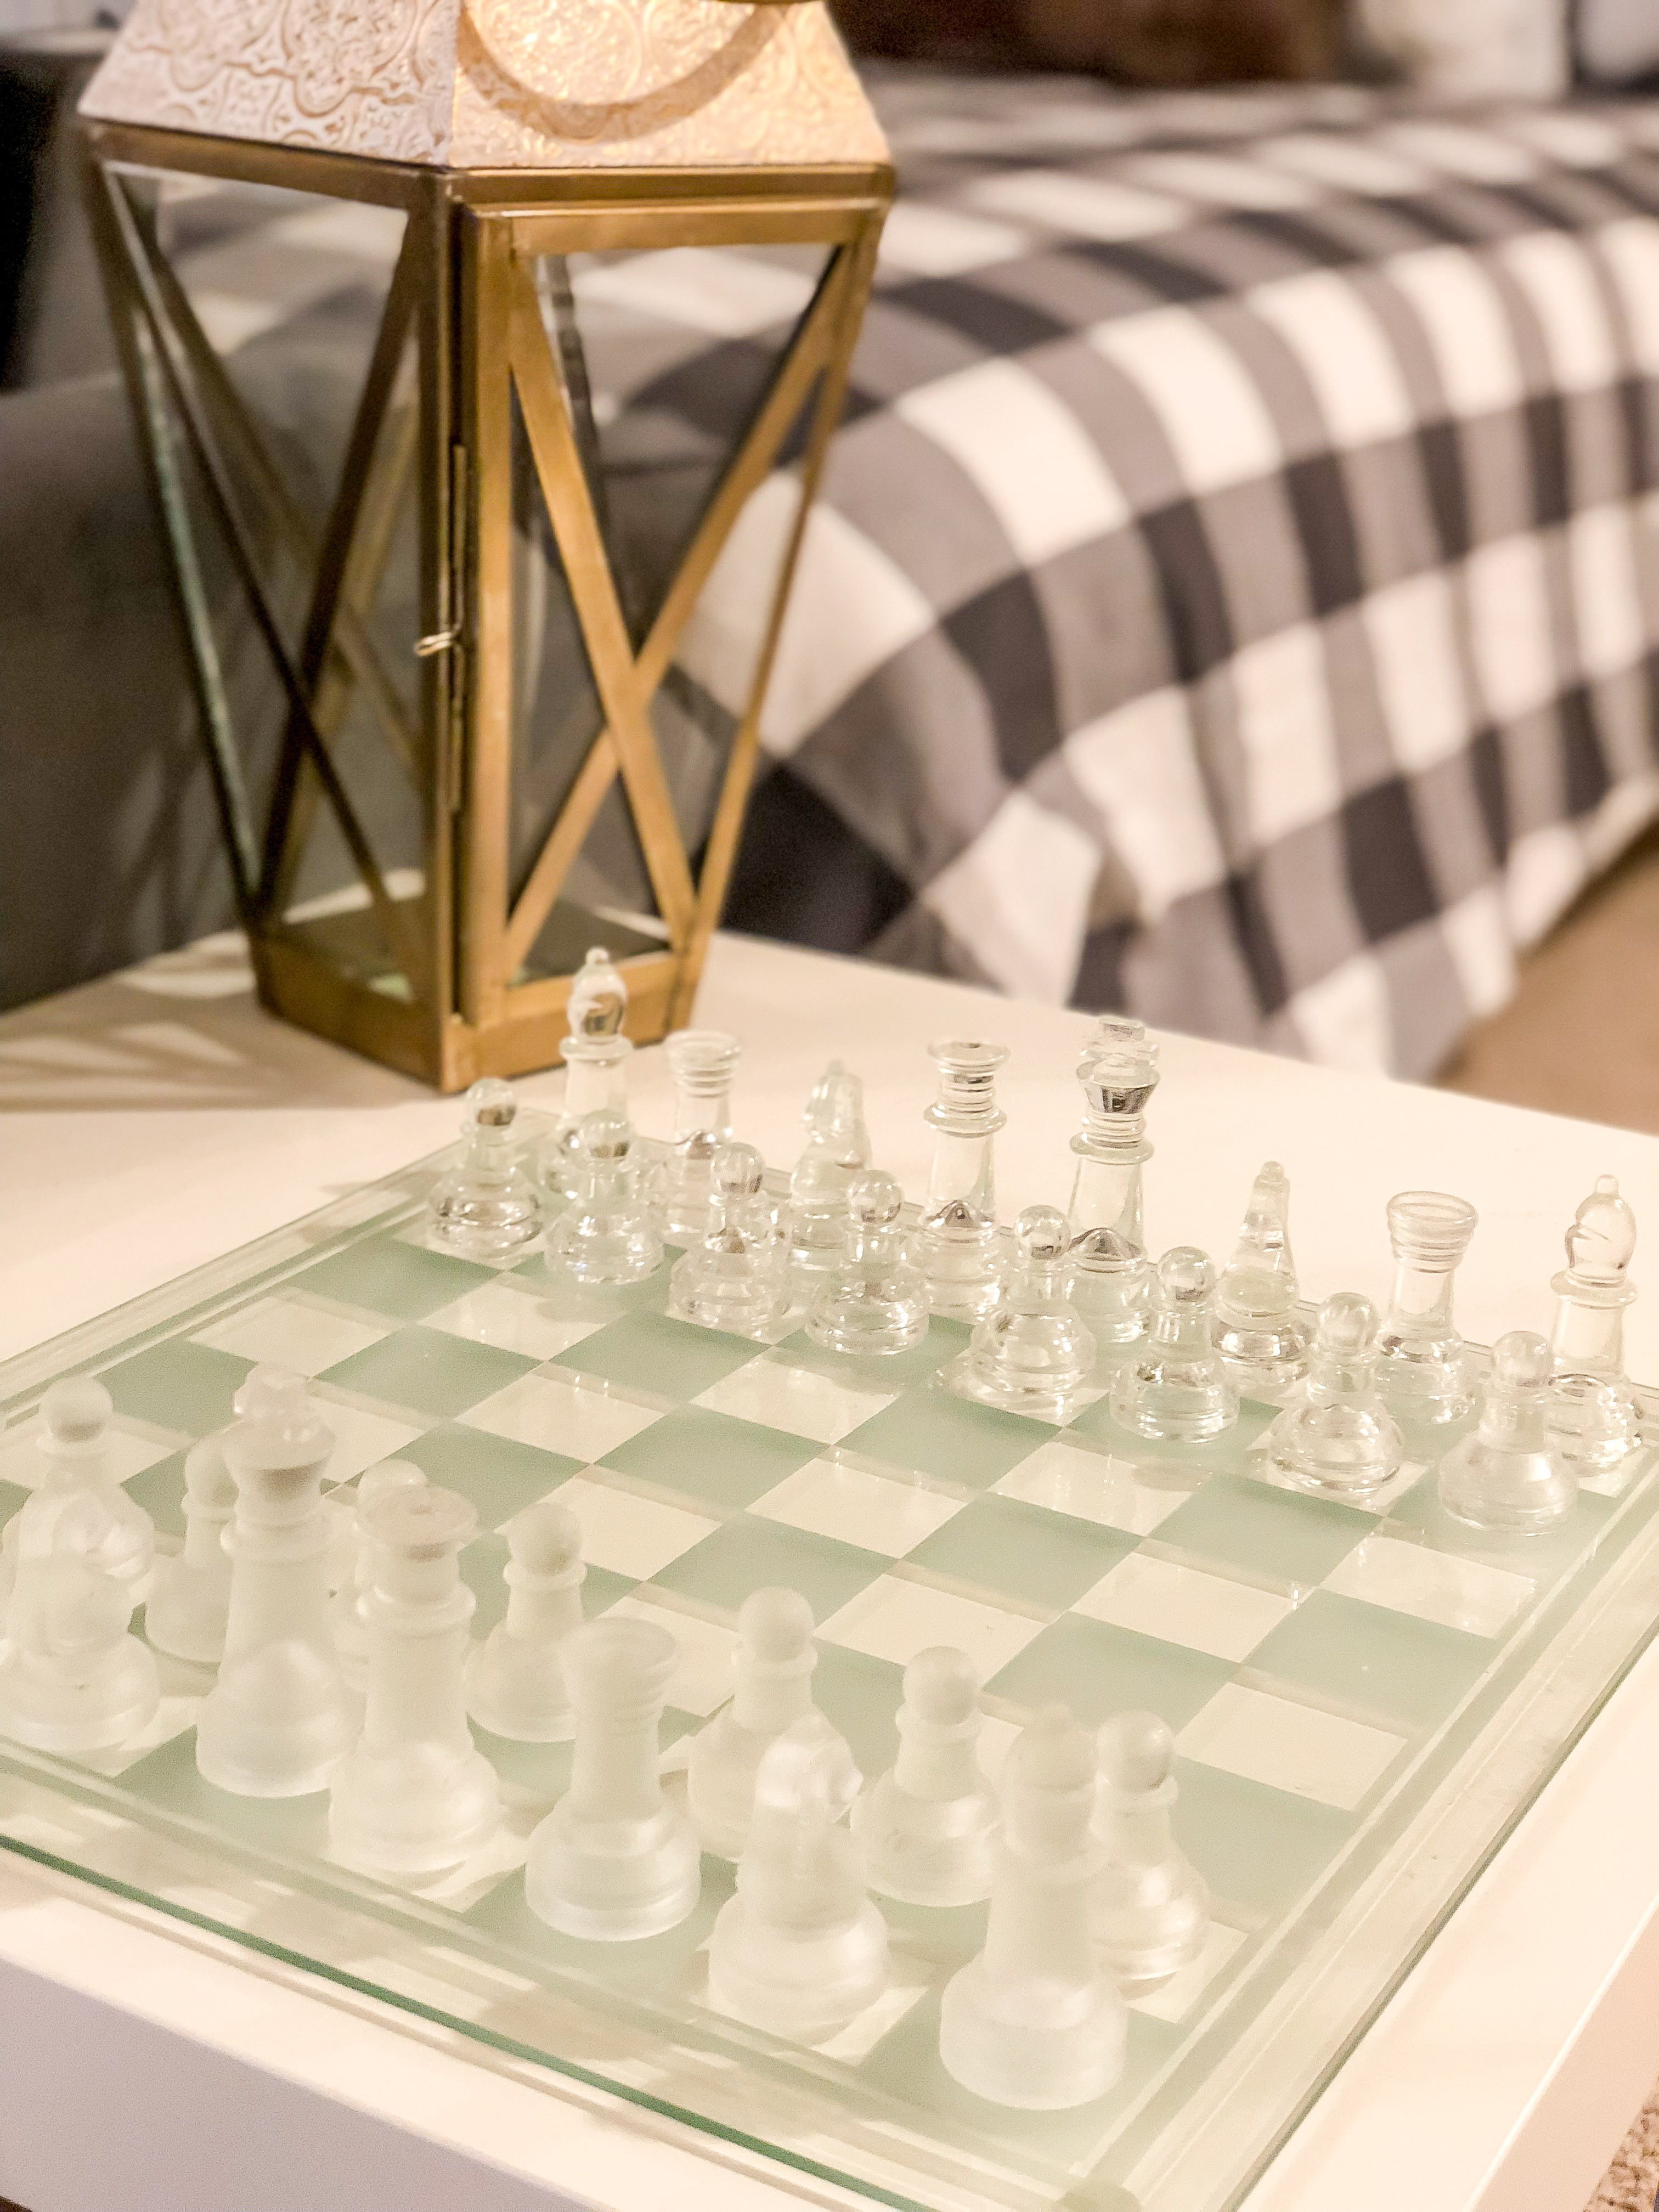
The Details
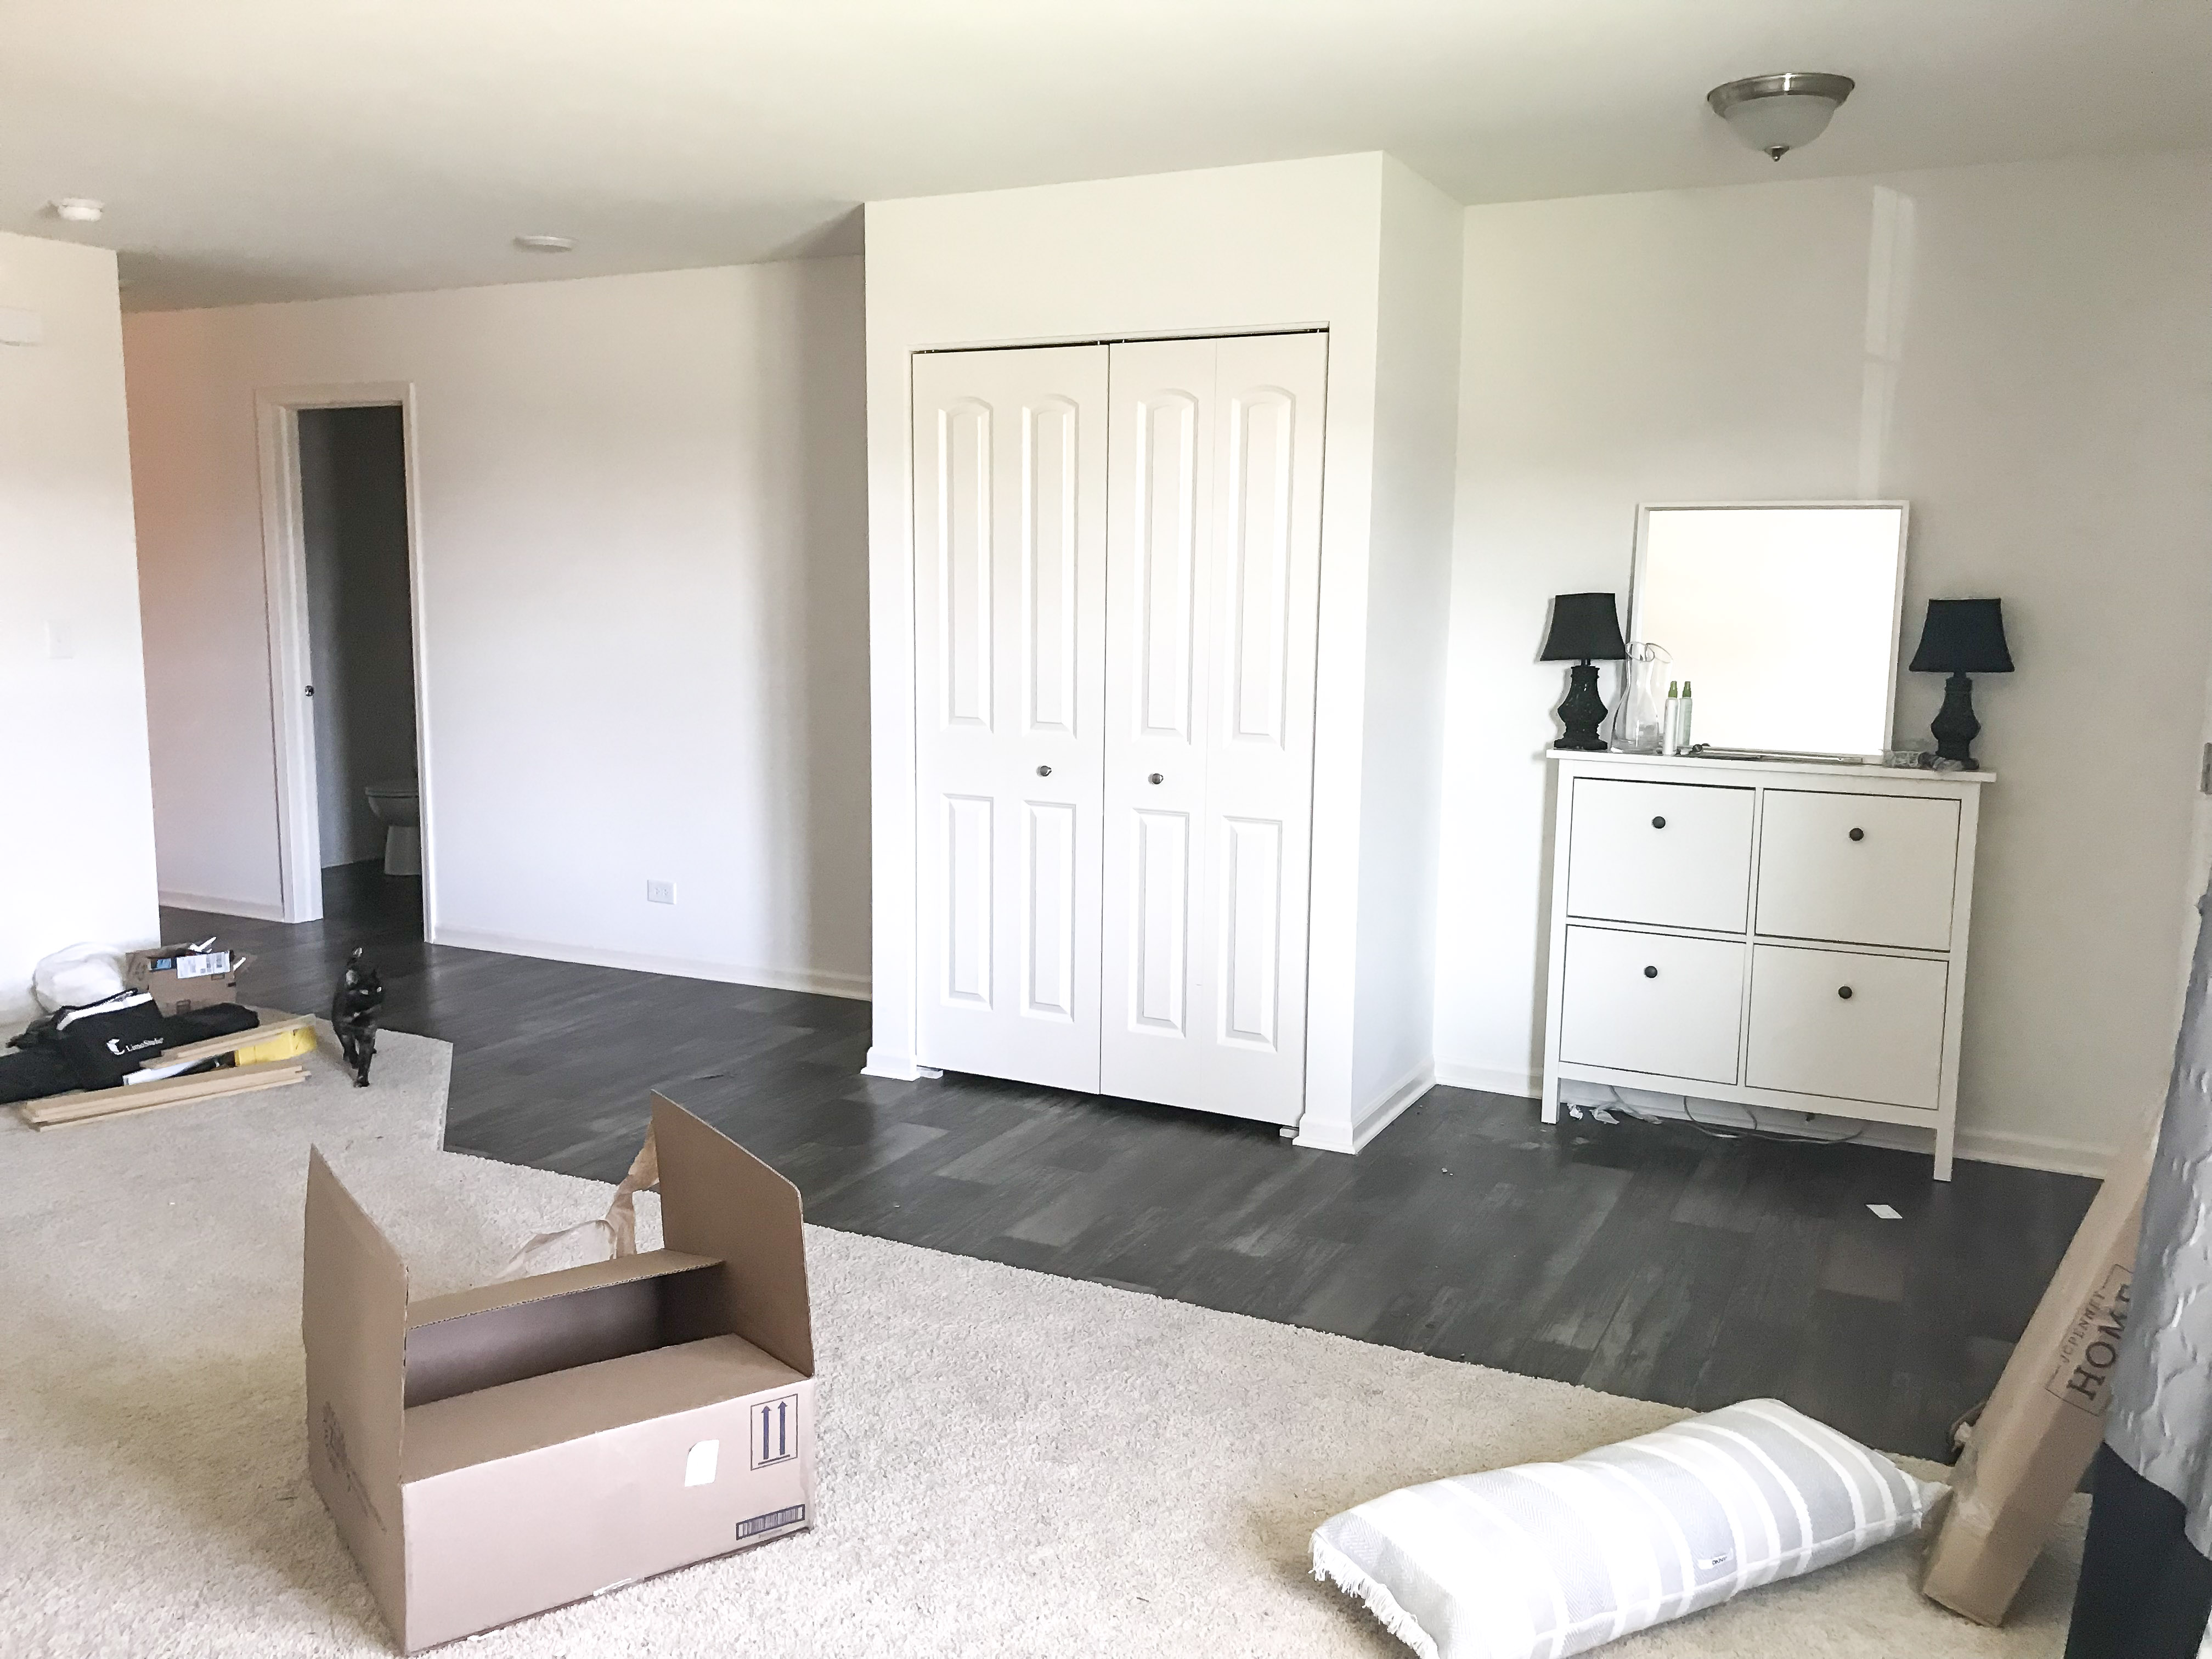
With the major tasks completed, the last few things I worked on were really just filling in details and styling. This is honestly my favorite part. It allows me to channel my inner Joanna Gaines, and of course gives me the opportunity to hit up some stores to check out the clearance section. And luckily because I had so many unopened boxes in the basement from our move (8 months ag0), I was able to shop my own house! 🙂


Special Thanks and Shout-outs
While I did all of the actual work myself on transforming this room, I had some great sponsors and partners behind me that helped with providing products to make this entire thing possible, so I wanted to call them out.
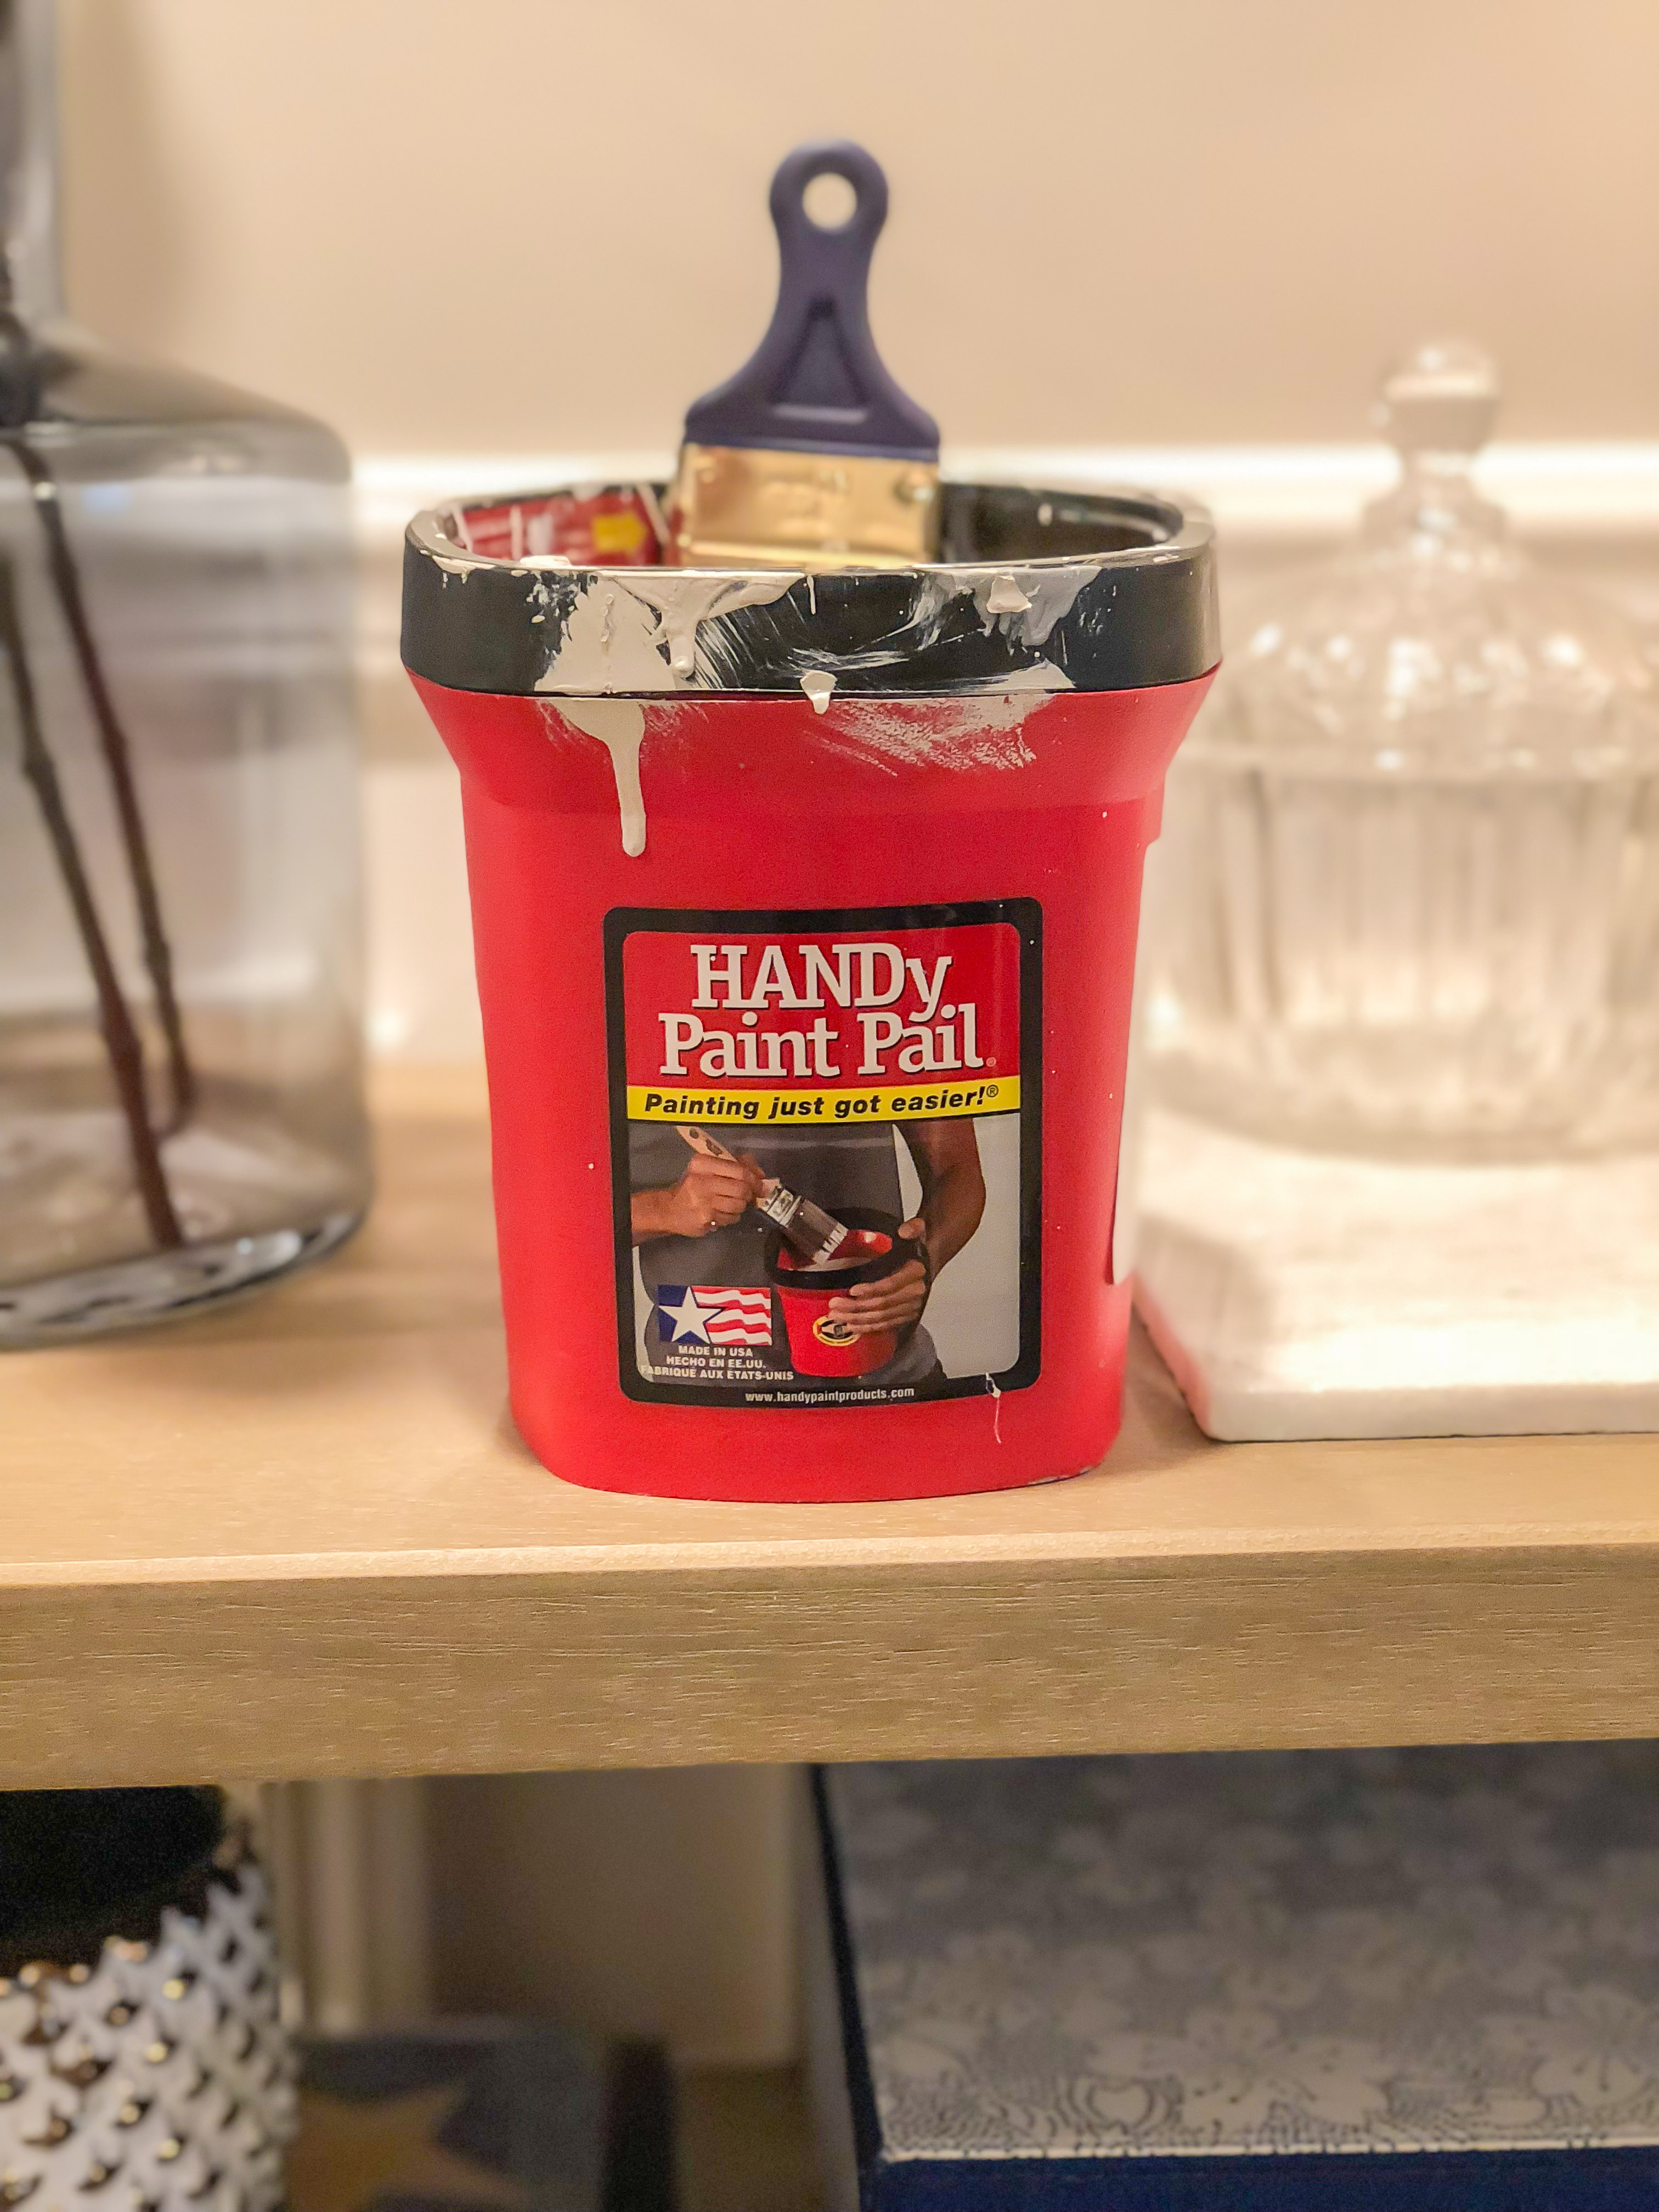
First of all, Handy Paint Products. Anytime I paint anything at all, I always use my Handy Paint Pail. As you may know if you’ve been here before, I paint everything with a paintbrush. Everything. And when you’re up on a ladder or stepstool trying to paint something with a brush, it’s not always easy holding a can of paint of bending down to dip the brush in the can without splattering everywhere. That’s why this product is my favorite! It holds just enough paint to make good progress on projects without being too heavy to hold. And on that note, it has a handle on it that allows you to slip your hand through it for an easy grip. And one final awesome bonus – a magnet to hold your paint brush! Seriously, if you don’t have one of these yet, do yourself a favor and go get one!
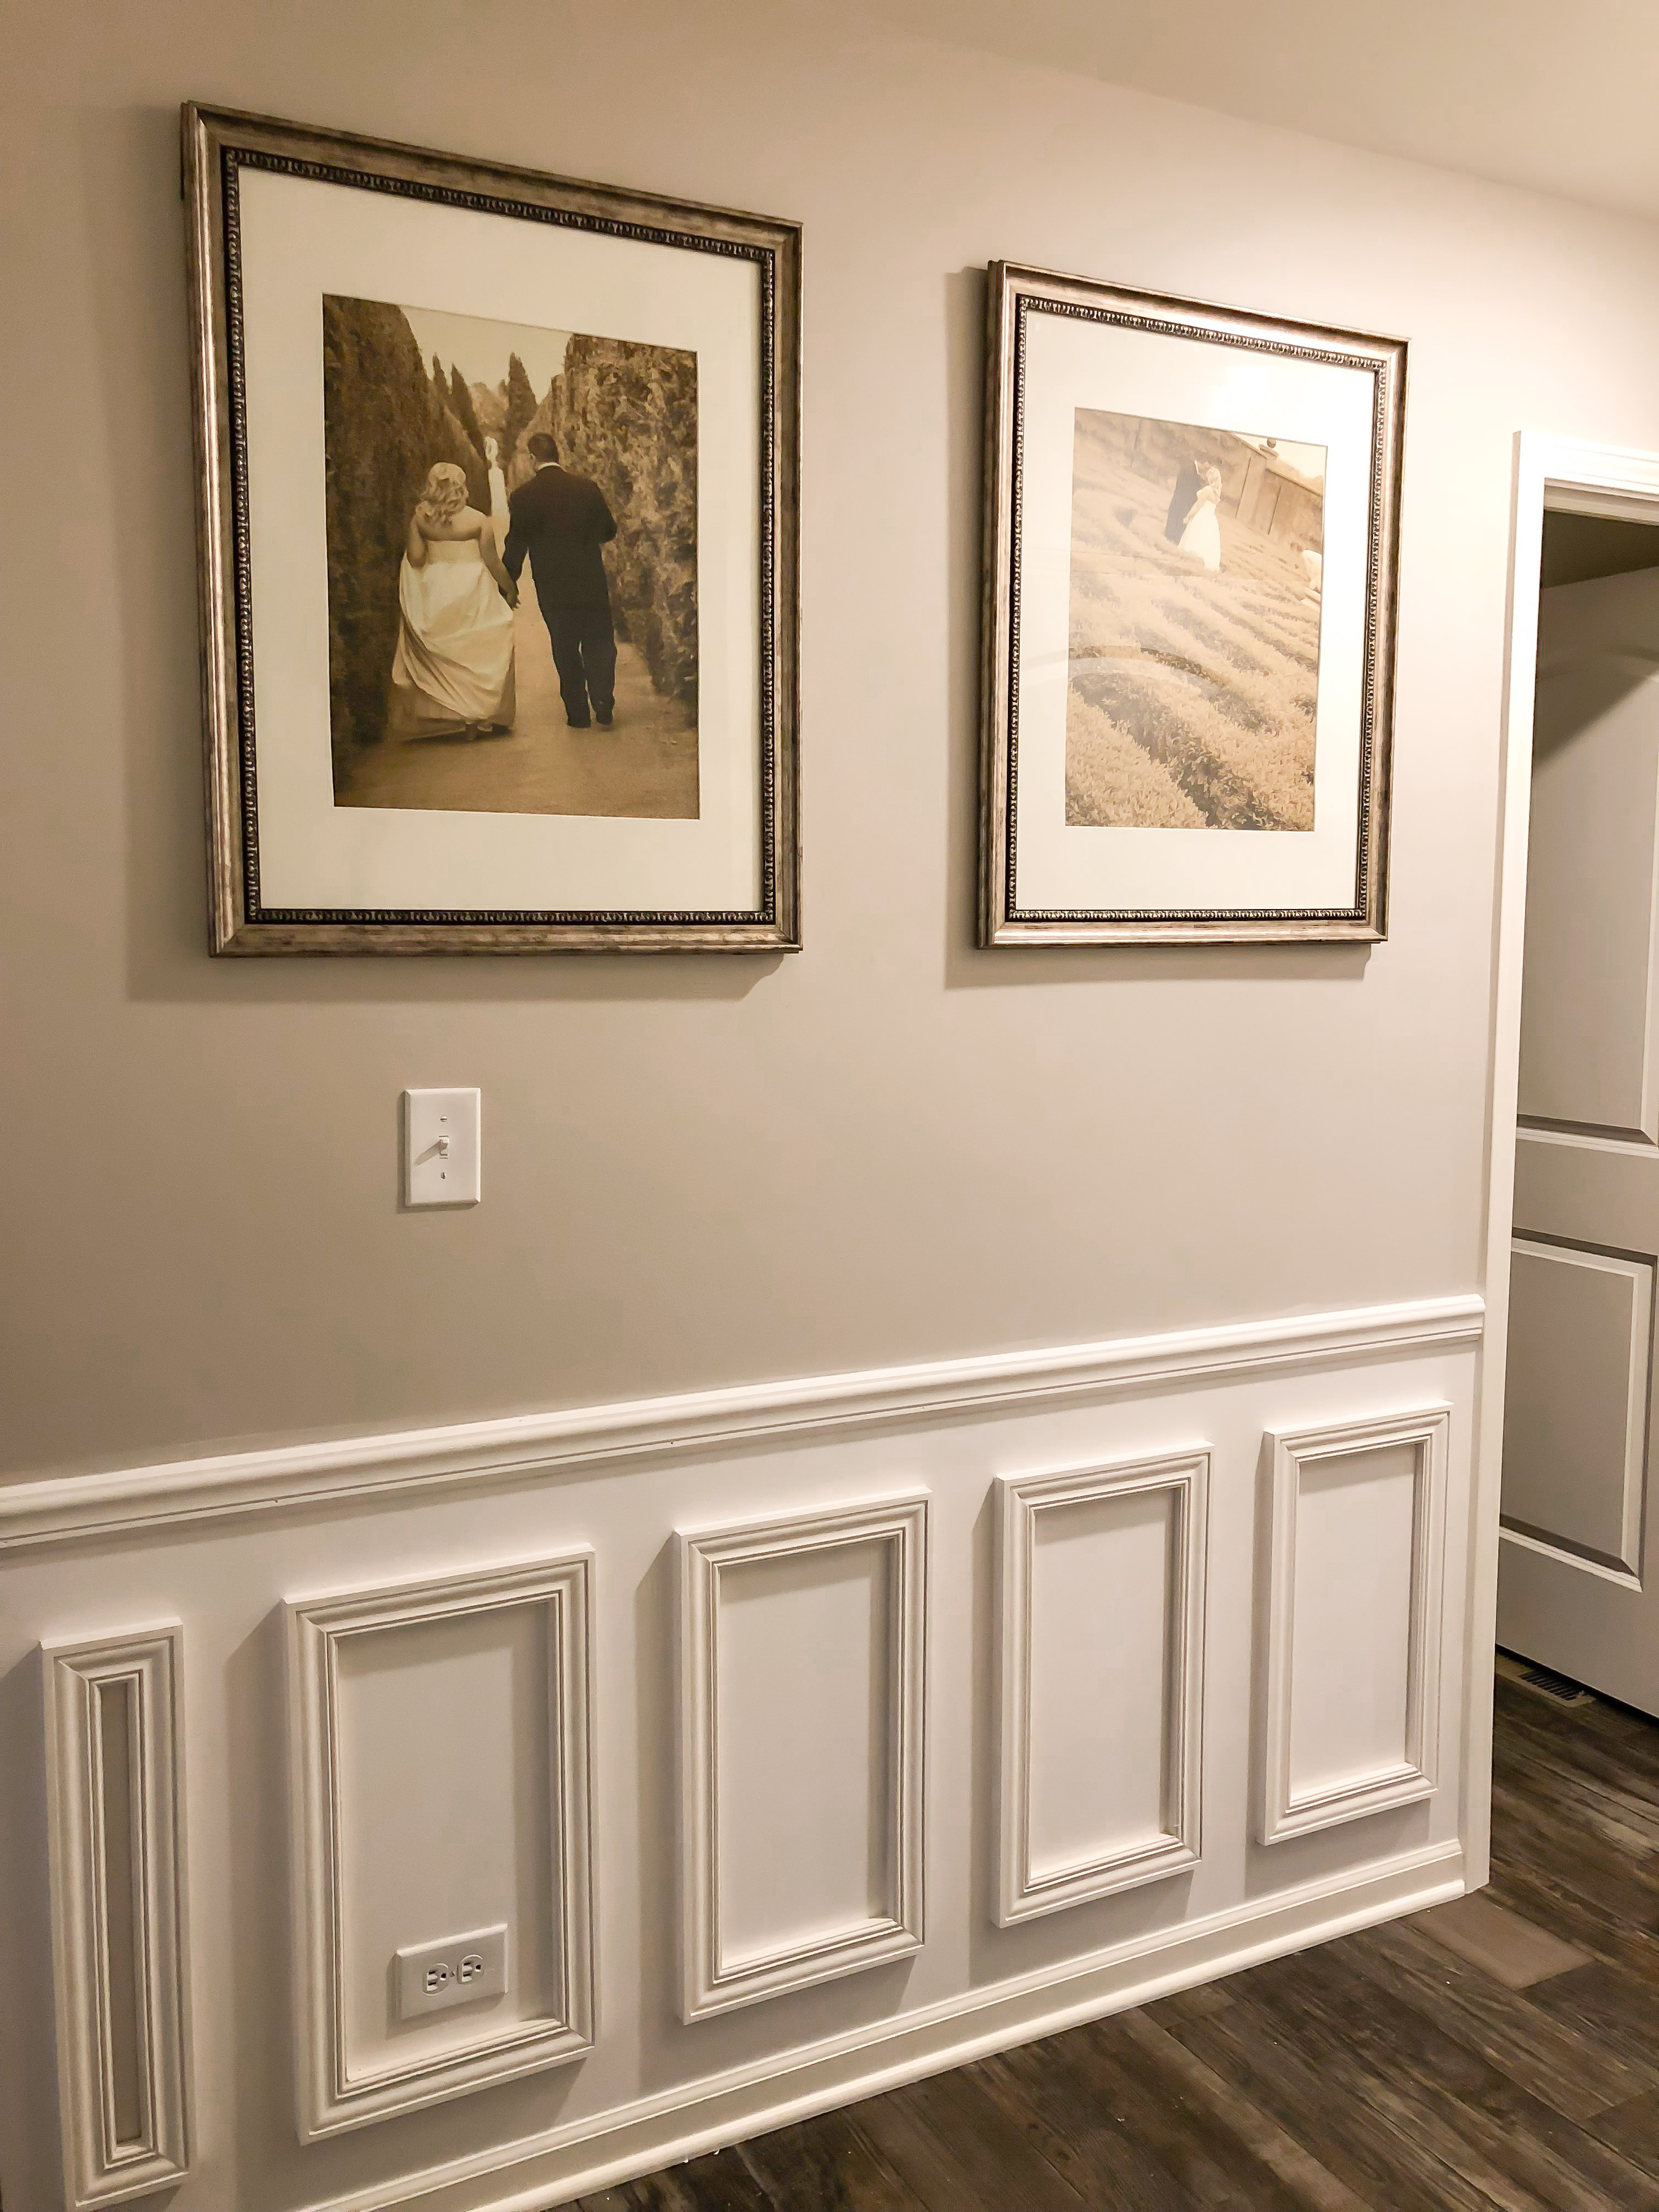
Next, Craftmold. These guys seriously made this room transformation so much easier! Craftmold makes wall panels that you literally just stick to the walls to instantly create beautiful wainscoting. It’s so easy to apply and makes this project actually possible to DIY. I can’t imagine having to cut trim to make all these panels. In fact, I can’t imagine it because I just wouldn’t do it. I know I wouldn’t have the patience for that. So if you’re looking to make a gorgeous update by adding wainscoting, please save your sanity and check out Craftmold panels to make your life easier!
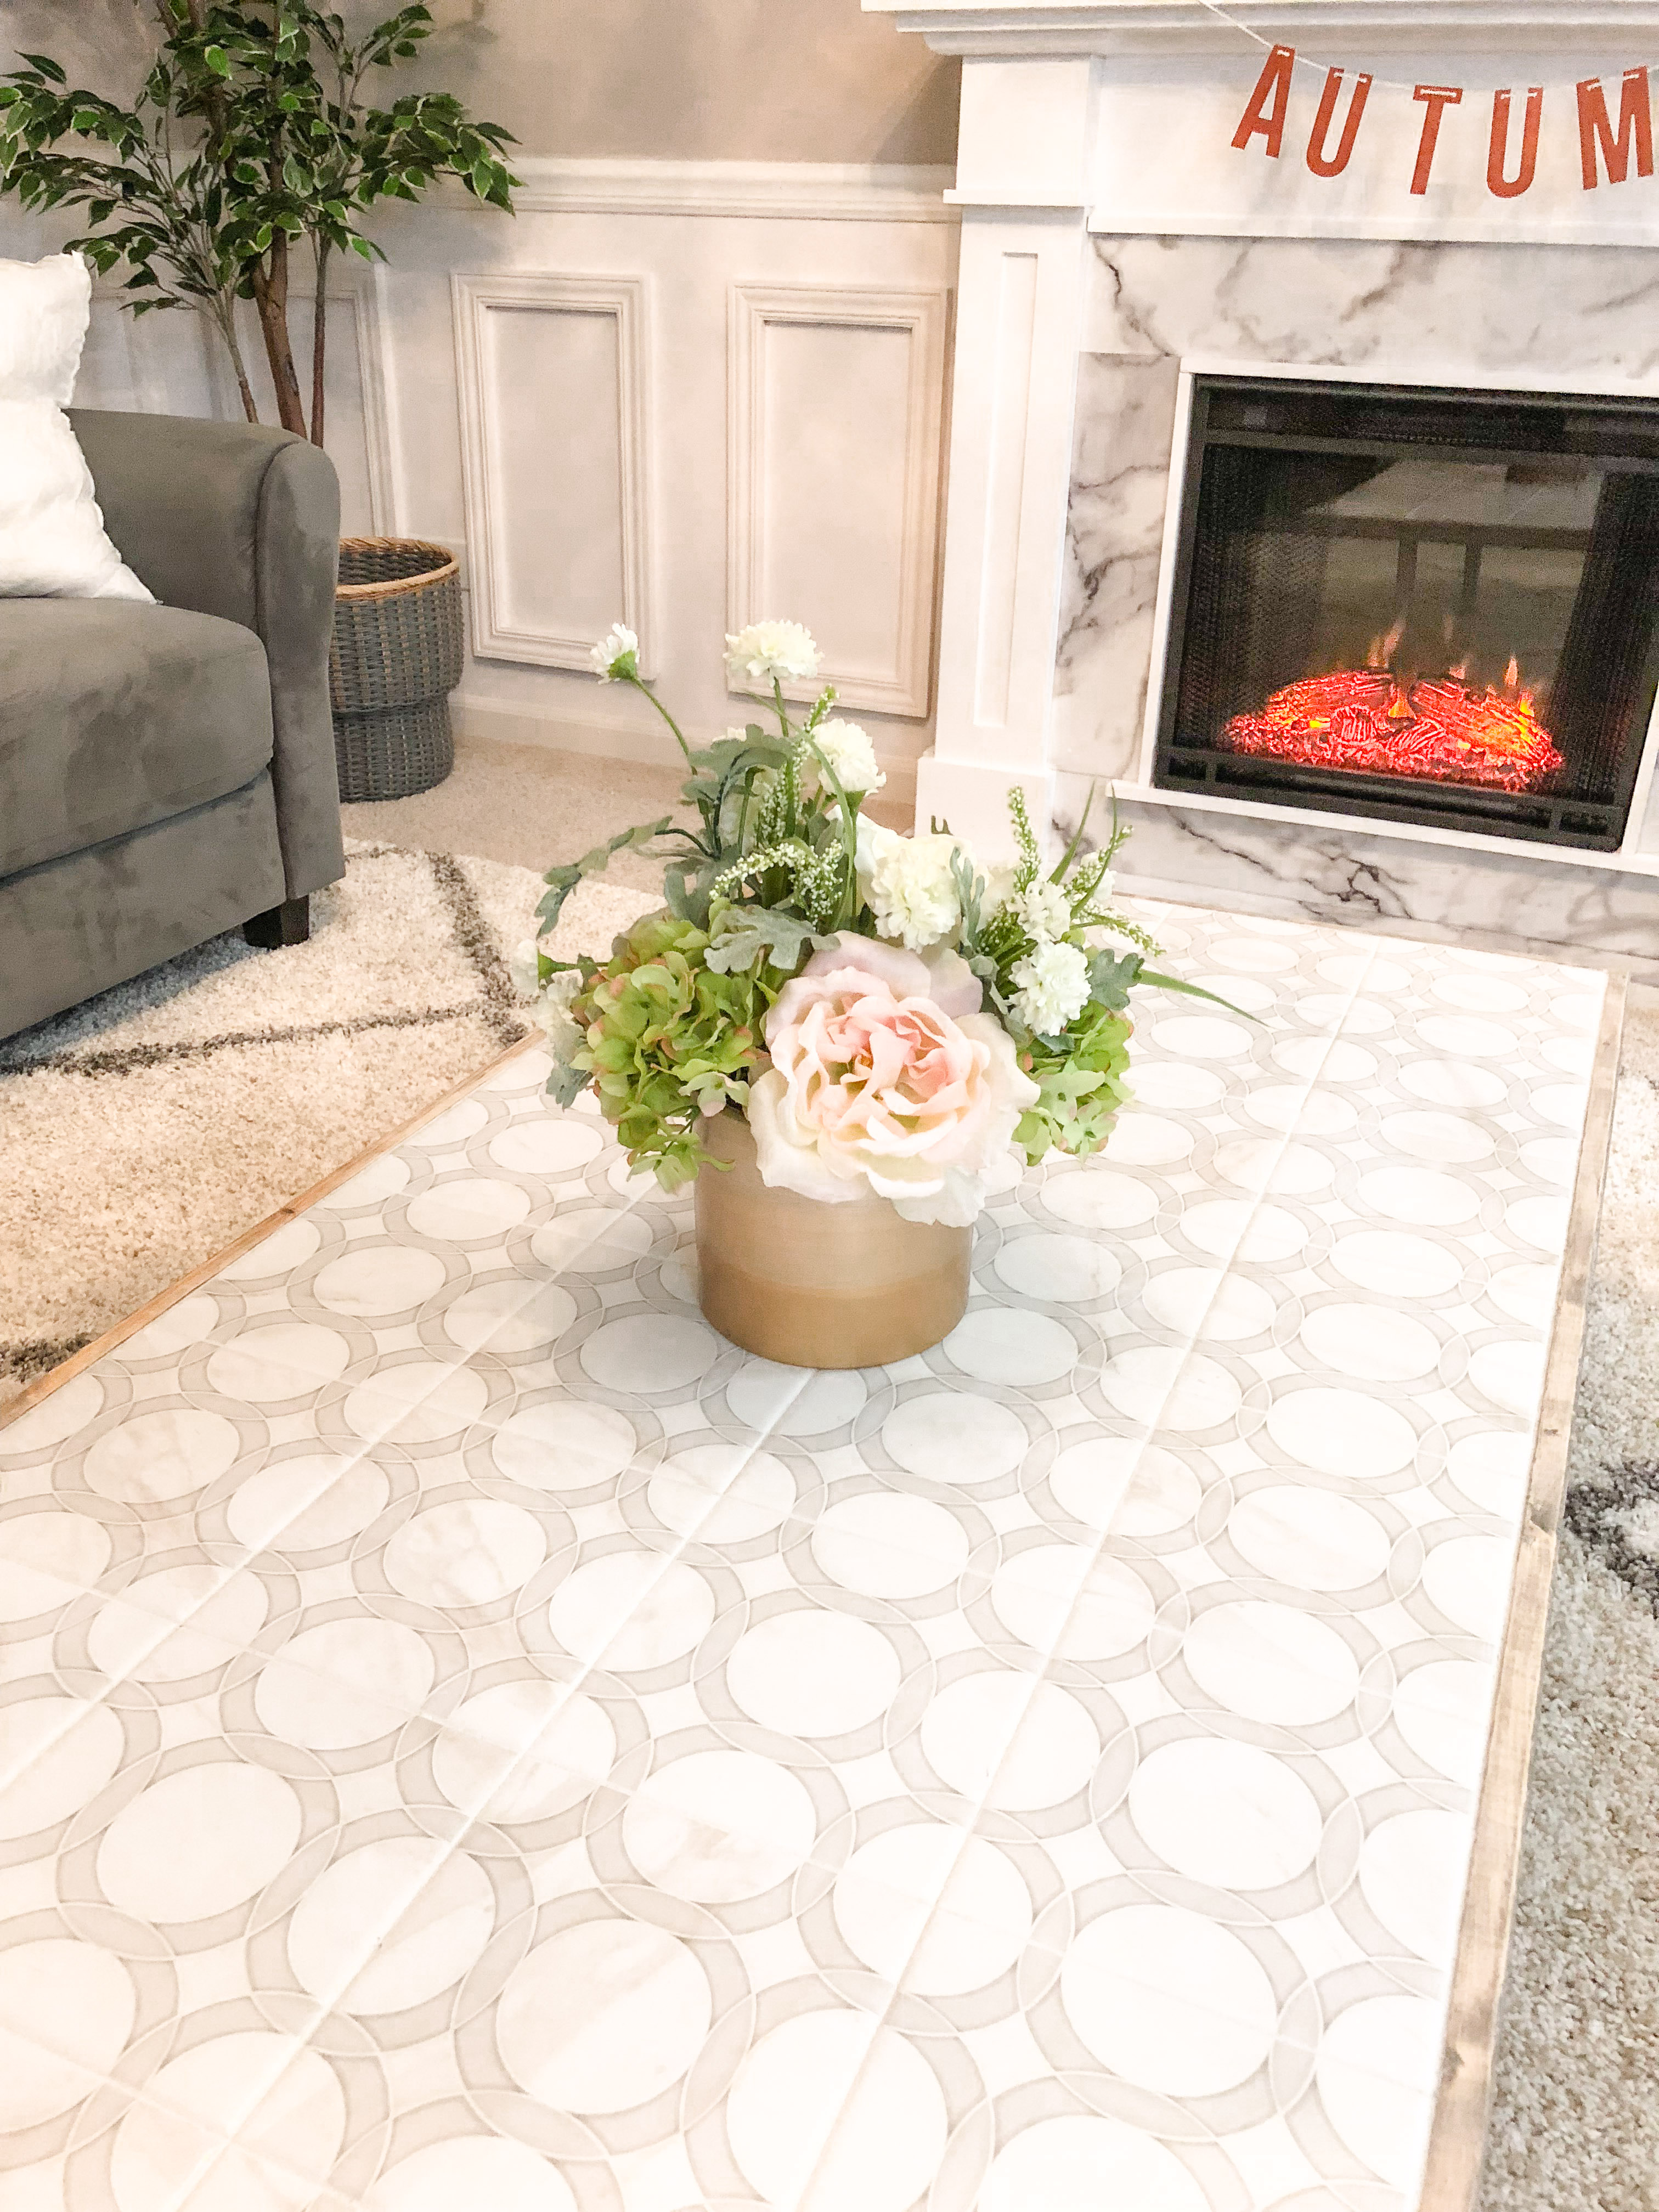
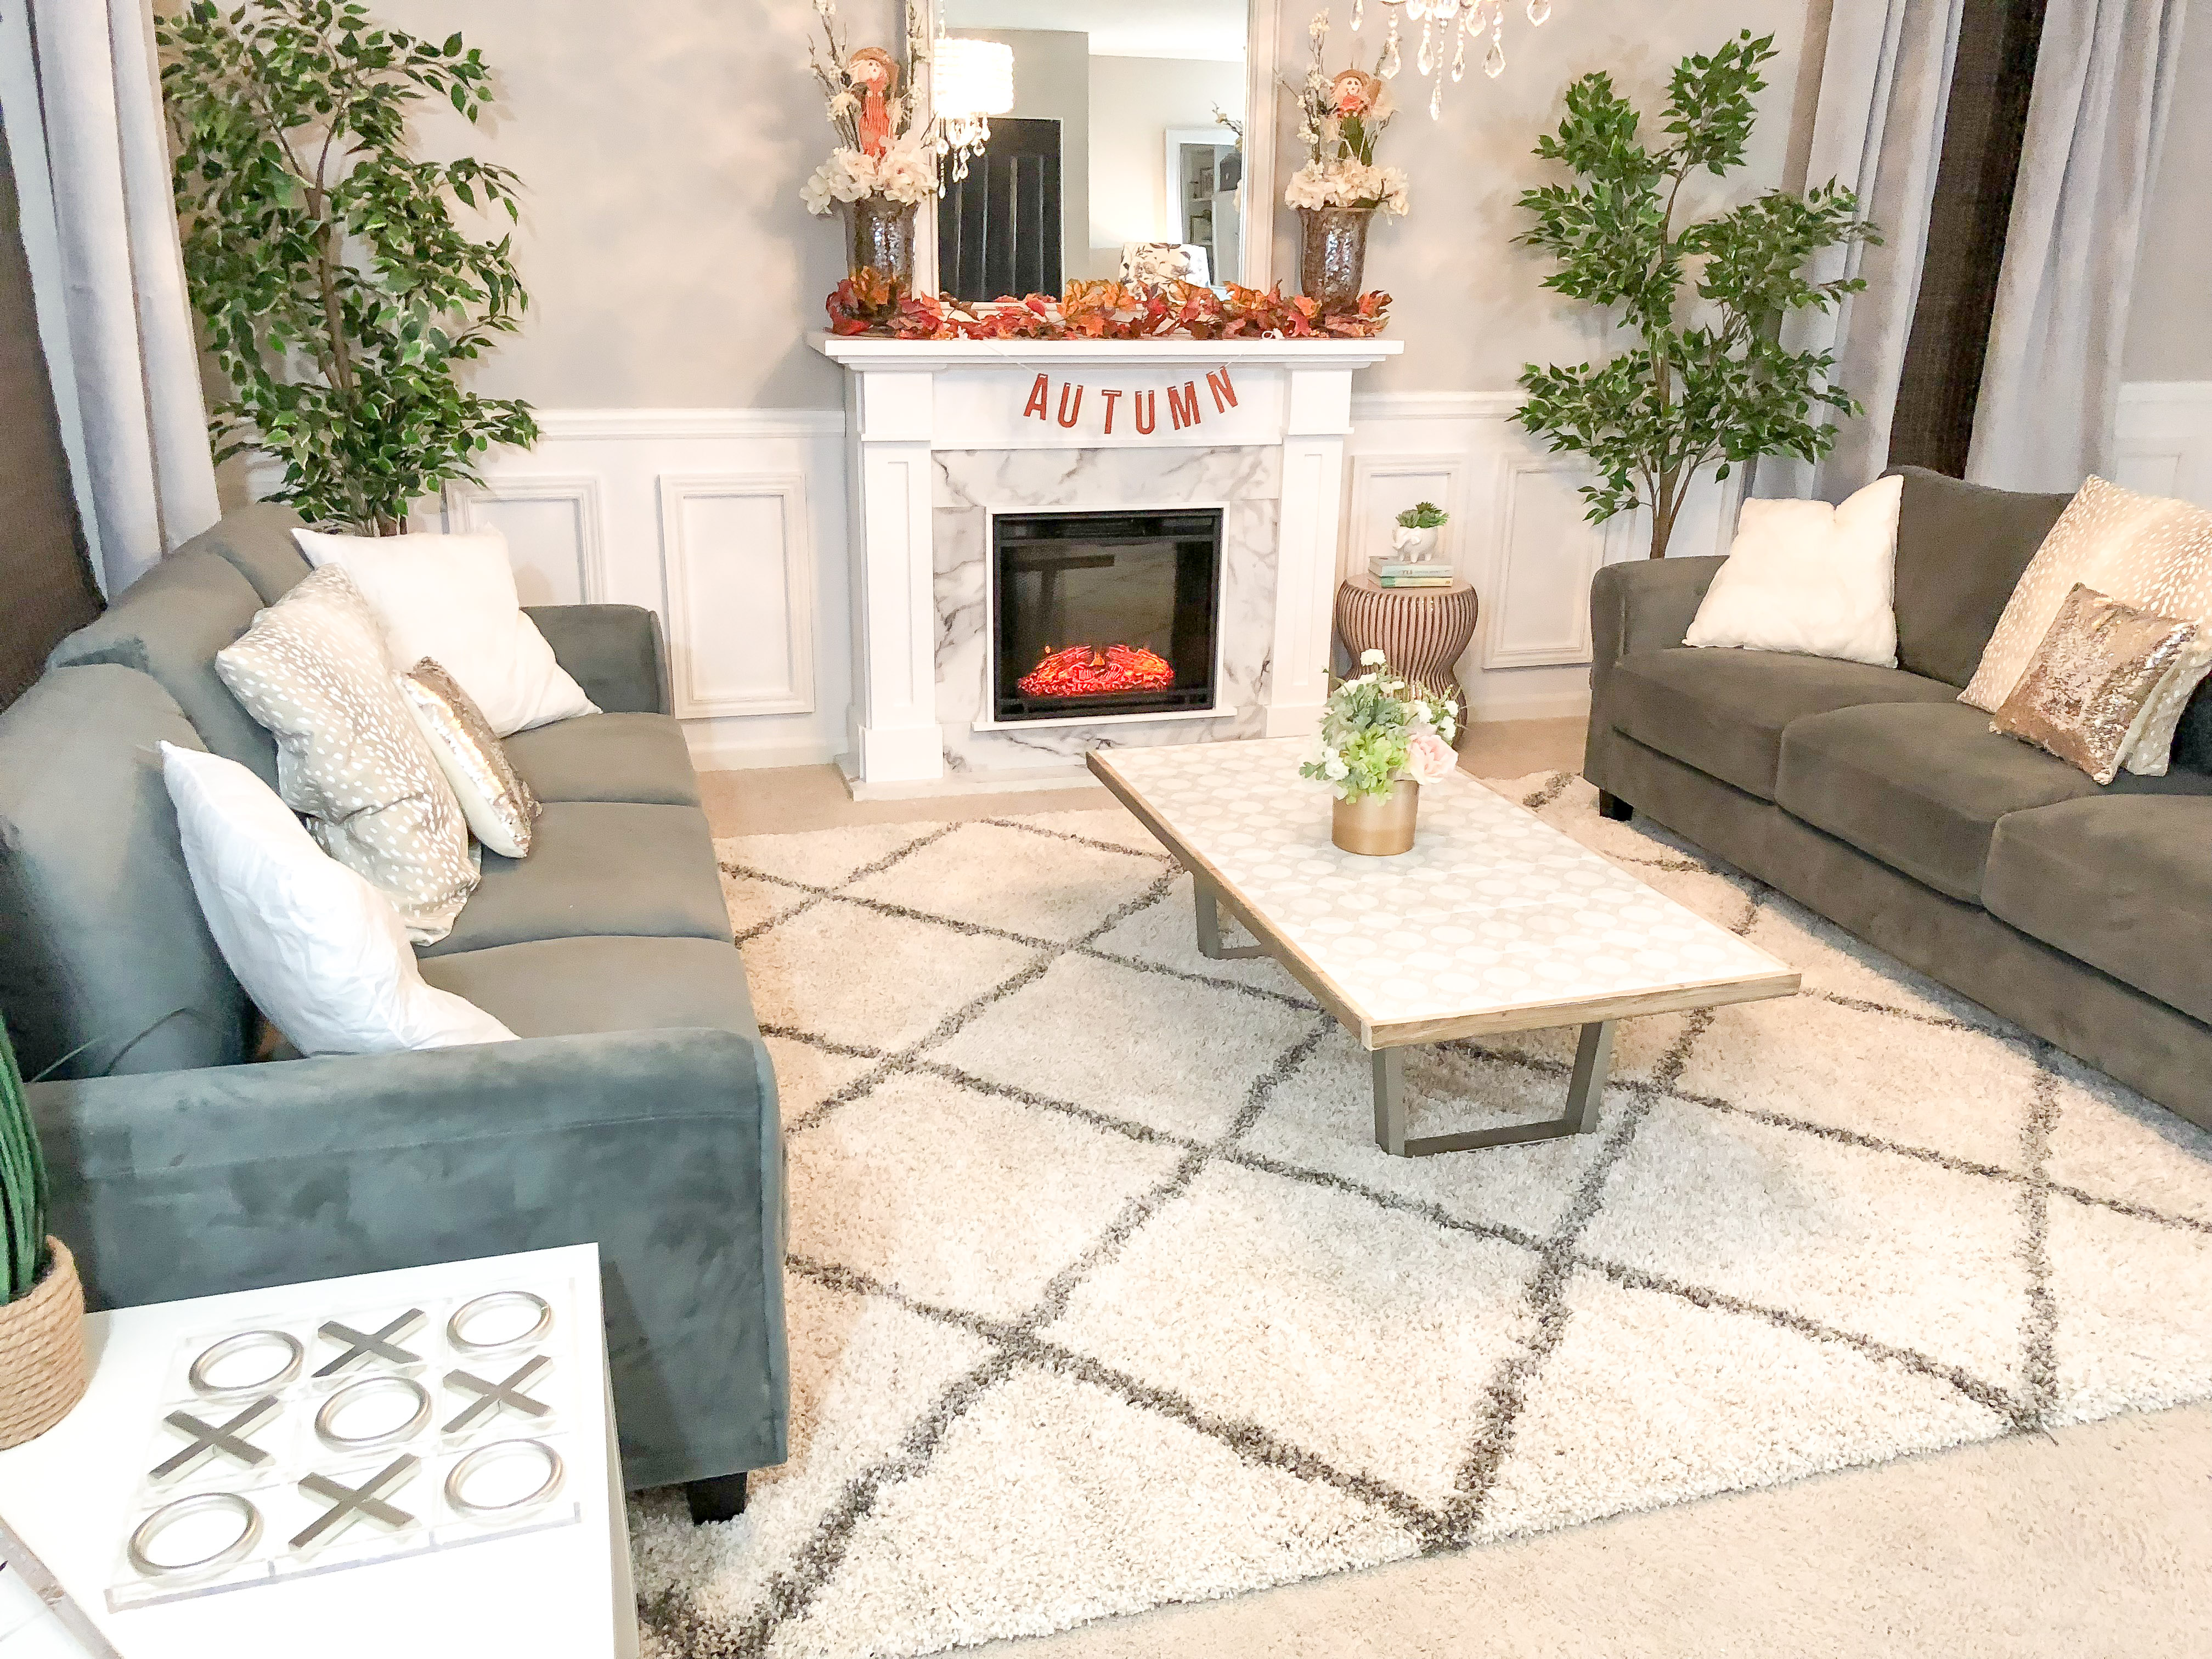
Finally, I have to thank RealFlame again for this gorgeous fireplace. This is truly the center focal point of the room and creates such an amazing ambiance that is just so warm and inviting. And speaking of warm, it really is warm! Since it’s been getting colder here in the Chicago area, I’ve been turning the heat function of the fireplace on which is making our cats very happy! 🙂
I’m so thankful for the One Room Challenge as it allows me the extra little push I need to actually get some home improvements done. There are so many great bloggers and designers that participated in the Fall One Room Challenge, so please head over to the ORC site to check out all of the amazing work that was done over the past 6 weeks, and get inspired to take on your next home improvement project!